Happy Camper

This time of year can be really busy: as soon as school winds down…summer camp starts up. In the next few weeks I’ll be getting my daughter ready to go to camp for the first time.

Here are some reminders to help get your camper ready to go:

  • Plan a time to shop for what you need to purchase.
  • Label everything your child will bring or wear to camp. There are several online companies where you can purchase pre-printed labels with your child’s name. 
  • Plan for the first day of camp. Talk with your child about what to expect, especially if this is the first time they are going. Have them pick out their clothes for the first day and have the backpack or bag packed the night before.

With a little bit of planning and organization, your child will be a happy camper!

School’s Out Organizing Part II: The Backpack Black Hole

In a recent post I recommended that parents undertake an end-of-year paper purge of school information. Continuing with that theme…don’t forget the black hole of your student’s backpack!

For many students, the backpack is a black hole: things go in and they don’t come out.

Even if your child is usually good at routinely going through the contents of the backpack, the end of year busyness may mean that papers, projects and other things get shoved in, and there isn’t as much time to go through them.  (My kindergartener is fairly organized but I know all spring she has been stashing more and more toys in her backpack for “free choice time.” I don’t think she has any idea how many erasers and Polly Pockets she has accumulated.)

Now’s the time to take a look in the backpack and clean out the papers, trash, food remnants, toys, and whatever else has been hiding in there. Parents of younger kids may need to lend a helping hand, but for older elementary school kids they should be able to do this on their own. At minimum, a child can dump everything out and the parent can guide the sorting of items into basic categories: trash, recycle, and things to keep.

Don’t forget to check out the lunch box too! If it can be used next year, give it a good cleaning. If not, be sure to make a note to buy a new one in the summer.

School’s Out Organizing Part I: The Paper Purge

It’s that time of year: school is almost out for summer!! This year, as school winds down, plan 30 minutes  to organize or "reset" the papers from the end of school craziness. 

In just 30 minutes you can get a lot done. Here’s how to get started:

  • Purge last year's school papers from your notebook, folder, or the pile on the kitchen counter where they have been sitting all year. Much of this paperwork will not be necessary to keep.

  • If there are papers such as class lists you want to keep, you can 1) file in a manila folder labeled with your child’s name, school and year…or better yet, 2) scan the document and toss the paper!

  • Start a file or binder for the incoming papers you'll receive for the new school year. Label this folder/binder with the school name and year.

  • Sort and purge the pile of school projects or artwork. Save the special pieces in a file or box (be sure to date them), and archive them in a dry, out of the way spot such as your attic or a closet.

  • Pick 1-2 creations to display and enjoy. (For more ideas on displaying and using artwork, see this article on my website.)

You can even turn this task into an end-of-school year ceremony with your child. Go through the projects and artwork with your child and have him/her help select the pieces to keep. Celebrate the year's achievements and then enjoy some special time together getting some ice cream, taking a walk, or playing your child's favorite game.

Take some time now to reset the school papers for summer...and in September you'll be glad you did!

Note: This article is based on one originally published in the July/August 2009 edition of The Neat Sheet.

Spring Fling: 3 Seasonal Organizing Projects

Spring has come to New England and with the warmer weather, we can say good-bye to snow shovels, boots, scarves, and wool sweaters. This month I’m working on a few seasonal organizing projects of my own.*

For each of my projects the key strategy is rotate: I put what I’m going to use now easily within reach, and put the off-season items away.

Hall Closet: I use an over-the-door shoe bag with pockets in my closet. In the winter the  pockets are filled with hats, gloves, and pocket-size Kleenex…but for the summer, they are replaced with sunscreen, sunglasses and summer hats. I also pull out all the winter things that have drifted to the bottom of the closet, and sort into piles: to donate, to wash, or take to the dry cleaners. Once everything is clean, it all gets put away in a basket at the bottom of the closet, or hung in the back of the closet. The spring jackets get rotated to the front of the closet for easy access.

Clothes Closet: Same strategy for my closet—take out the winter things for storage in the attic, while checking to see if there are any clothes/shoes that I haven’t worn and can donate. I also make piles for dry cleaning and mending. Then the summer clothes go in and I’m ready for warmer weather.

Basement: This is another area to rotate items: the snow shovels go to the back of the basement in one corner, making it easier for me to reach the gardening equipment. The ice skates and sleds get put away, while my daughter's bike comes out.

*If you live in an area that doesn’t have such drastic weather changes, you can still use the Spring and Fall as reminders to do a sort and purge of the closets, basement or attic.

Happy Anniversary to One of My Favorite Organizing Tools

30 years ago this month, 3M unveiled one of my most-used and beloved organizing tools: the Post-it Note! Here are 3 of my favorite ways to use Post-it Notes:

  • For my daily to do list: no more than 3-5 items!

  • For my list of errands…the note pads sit on my desk so I can jot down errands as I think of them, then the note moves to the door, then sticks in my car or my bag as a reminder

  • As temporary labels: when organizing drawers or bins for myself or a client, I use the notes as temporary labels; once I know the system works, I can do a more permanent label

Notice that I didn’t say I stick them all over my computer screen! One note might be OK, but if you have them circling your screen you need a better system.

It’s hard to believe this little invention has been around for three decades. For Post-it Note history and fun facts, including the marketing pilot called the Boise Blitz, check out the 3M website.

Note: Post-it brand notes are a registered trademark of 3M Corporation.

De-Clutter & Donate: More Than Words (Waltham, MA)

For readers in the Boston area, here is a great reason to do some spring cleaning and de-cluttering of your bookshelves: support the More Than Words book drive April 23rd-25th.

More Than Words helps at-risk youth by giving them the opportunity to “take charge of their lives by taking charge of a business.” The More Than Words used bookstore “features a wide array of titles, comfortable seating, and free wi-fi.” There is even a coffee bar offering Starbucks coffee, tea and baked treats!

April 23rd –25th More Than Words is trying to collect 6000 items for their store. Bring your unwanted books, CDs, DVDs and videogames to More Than Words in Waltham during store hours and help them reach their goal.

De-Clutter & Donate: LexFUN Consignment Sale (Lexington, MA)

Do some spring cleaning in your closets, attic or basement…and then donate or consign your gently used children’s clothing, toys and equipment as part of LexFUN’s annual Consignment Sale. LexFUN is Lexington’s Five and Under Network, which offers social, educational, and recreational opportunities to families with young children (infants to age five).

The Consignment Sale takes place on Saturday May 8th and benefits LexFUN’s Preschool Scholarship Fund. Find more information on the Consignment Sale here.

De-clutter & Donate: Dress for Success

This week I had the opportunity to visit a great organization, Dress for Success. Dress for Success “promotes the economic independence of disadvantaged women by providing professional attire, a network of support and the career development tools to help women thrive in work and in life.” For over 10 years this organization has been supporting women across the country (and internationally).

Dress for Success seeks donations of good quality suits and other professional accessories to help stock their boutique, because all suits are given to their clients for free. The Boston affiliate has a schedule of clothing donation days.* This week I finally admitted that I wasn’t going to fit into those few suits left in my closet, and dropped them off. What a wonderful experience!

As I entered the office, I was greeted, my donations were reviewed and hung on racks outside the door. I was then invited to look at the “boutique” and learn more about the program. The next room was set up as a boutique store, with racks of suits neatly lining the walls. There was also a rack of handbags, and a center table with jewelry artfully displayed. The last room included dressing rooms a wall of shelves filled with shoes. There was even a section where Dress for Success clients could obtain attire for a second interview.

I was impressed at how polished and beautiful everything looked..it made me want to go shopping! Clients are treated to a dignified and professional experience. With locations across the country, this Spring, why not de-clutter and donate to Dress for Success?

*Note to readers in the Boston area, I was pleasantly surprised to easily find parking outside the office on Commonwealth Ave! The next donation day in Boston is Tuesday, May 4th. If you are a client of That’s Neat! Organizing and would like to donate a suit but can’t get to Dress for Success, email elizabeth@thatsneatorganizing.com and I may be able to drop off your donation.

Preserving Treasured Photos

Here's the second post in my Preserving Treasures series…I'm pleased to have our guest blogger, Gabriela Burgman, a trained archivist and professional organizer, back to share her tips for preserving special photos.

In the summer of 1999, I had the wonderful opportunity to work in the photograph archives at the San Diego Historical Society. My duties included describing, dating, and preserving postcards and photograph collections gathered from businesses and families that had lived in San Diego for the past 100 years.

As I handled hundreds of unidentified images and photos that were disintegrating from poor storage, I realized that we, as archivists, needed to teach the public about organizing their photos so that when we received them as donations several generations in the future, their value would not be lost. So I am here today to give you a quick lesson on photo preservation.

Why are photos so sensitive? Print photographs are made up of many layers that come together to form the image. Since photos are more complicated than pieces of paper, they tend to need a little more TLC if you want them to last more than a few years.

Preserving Photos

There are three main things to think about if you want your photos to be around to show the grandkids (especially the really embarrassing photos of their parents).

1. Treat your photos like a living thing. Photos are sensitive to heat, light, humidity, and even air pollution. All of these things can fade, warp, scratch, melt, and disintegrate your photos.

So how do you keep them in good health? Store them in conditions that humans like to hang out in: low humidity, steady in temperature (a bit on the cool side), absent of rodents and insects, and in an atmosphere low in pollution - no smoke, no cleaning solvents, and no paints or varnishes (this includes newly painted rooms or furniture).

Some basic Do’s and Don'ts:

  • Do keep photos out of direct sunlight and away from unprotected fluorescent lighting.
  • Do keep the area where you store your photos clean.

If you ever want to see a demo of what can happen to your treasured objects depending on what room you store them in, visit the Image Permanence Institute website.

2. Store your photos like prized possessions. Now that I've impressed upon you how delicate photos are, let me show you great ways to preserve and organize your images.

First, some important Don’ts:

  • Don’t think that papers, albums, envelopes, and adhesives labeled “archival” or “acid-free” are automatically safe for your photos. The Northeast Document Conservation Center explained it best: “There are [no] scientific standards defining the term archival-quality enclosures, and this term in catalogs can be misleading…Boxes, mats, folders, and other paper enclosures for preservation use at home should be low-lignin or lignin-free, and buffered throughout.” 
  • (Find a thorough explanation of terms like “buffered” and “lignin” from the Northeast Document Conservation Center here; scroll down to “Storage Enclosures.”)
  • Don’t stuff your photos tightly into drawers, files, envelopes, or plastic containers. When you compact the images they have a greater chance of sticking to each other.
  • But don't go to the extreme and store your photos too loosely in an oversized container. When you do that, they tend to slump, curl, or even bend from being jostled around.

Now for what you’ve been waiting for: how DO you store photos? There are two levels of “armor” to consider:

1) Paper or plastic?  Ideally, photos are stored in either a paper envelope or a plastic enclosure. Deciding which one to use will depend on how many times you will look at the photo, the state of the print (is the emulsion flaking off?) and how big the photograph is.

  • Look for enclosures noted to be “PAT.”  This means they’ve passed the Photographic Activity Test (PAT) and will not react with your photos.
  • Store photographs larger than an 8x10 horizontally in special folders.
  • The same rules pretty much apply to your negatives. You can store them in plastic unless they are larger than 4 x 5 or are nitrate negatives. Then you need to store the negatives in paper envelopes.
  • If you prefer to put your photos directly in albums, make sure the pages are also made of the appropriate plastic and that any paper used is non-acidic. Do not use albums with "magnetic" pages, black paper pages, or ones made with vinyl.

2) Box or album? After your photos and negatives are in their proper first enclosures, now you can do one of two things: store them in boxes or put them in albums.

  • Boxes: Try to store your photos vertically, supported within the box so they don’t slouch over. Make sure the box is the appropriate size; use shoe boxes for 3x5 or 4x6 photographs, and document boxes for folders. Your oversized prints should be put into flat boxes and stored horizontally (never vertically).
  • Albums: If you chose to put your photographs in albums, make sure to buy both the inserts and covers from reputable dealers.
  • If you decide to save your photographs in the form of scrapbooks, I highly suggest you visit the Scrapbook Preservation Society to find out how you can preserve all the hard work you’ve put into making these family heirlooms.

I recognize that you can’t put your entire photograph collection into museum preservation order. At minimum, you really should group photos together in small stacks (say 36) and put into buffered folders or envelopes (as shown in this kit sold by Light Impressions).

3. Handle photos with care. Whenever you are going to sort, view, or handle your photographs, make sure that you are first working in a clean, uncluttered area, and have clean hands. (If you are sitting down to do a large project with treasured photos, you might want to even wear clean, white cotton gloves.)

If you are going to try to label your photos, do not use ink or felt-tip pens. You can either write lightly using a soft lead pencil or purchase a special blue photo marking pencil.

I hope you find it useful to preserve your most special photos for years to come!

Gabriela Burgman, owner of Claiming Space, holds a BA from Mount Holyoke College and a Masters Degree in Information Science from the University of Michigan. She has worked in colleges and universities for six years as an archivist and a records manager, assisting academic offices, administrators, and retiring academics sort through their files for preservation or disposal.

Spices of Life

My super-organized cousin is back again to share how she organizes her spices. 

A few weeks ago a neighbor asked me how to go about organizing the spices in her kitchen. She, like many of us, had collected a variety of spices beyond the usual parsley, sage, rosemary and thyme and the storage and organization of these various bottles, jars and cans has become an issue.

Years ago I had the same issues in my kitchen so I came up with this system to eliminate the problem. Here’s what works for me:

  • Buy spices in bulk if available. This eliminates packaging waste and you can purchase just the amount you need.
  • Buy one style of container and decant all of your dried spices into them. Buy a few extras so you’ll have them on hand when you need to add a new spice to your collection. I like clear glass bottles with screw on lids – these are a great choice. 
  • Label all of your spice jars either on the top if you choose to store them standing up in a drawer, or on the side if they are stored in a pantry or cupboard.
  • Organize spices alphabetically.
  • Put a removable or reusable wipe-off sticker on the bottom of each spice jar with the expiration date of each spice. Most spice companies will date their spices for freshness.
  • If you’ve purchased a bit more spice than will fit in your jars, store it in small zip top bags, label with the variety of spice and expiration date and store in the freezer.

I keep the spices I use everyday - oregano, rosemary, sage and thyme - on my kitchen counter in a tray by my stove. I also keep a variety of salts and peppers on another tray along with bulbs of garlic, olive oils and vinegars, and I have two pots of fresh herbs on my kitchen windowsill.

Hopefully these tips will be helpful to you in your own kitchen. Remember to select a container and labeling system that work for you and stick with it. Soon, you’ll find it’s fast and easy to have a pinch of fresh herbs and spices at your fingertips.

-Janna

Tornado Season: Spring Cleaning

Feeling ready for Spring? Here's some inspiration from guest blogger, Janna Lufkin.

I grew up in Idaho: we don’t have tornadoes but you’d think one hit the house every March or April. It was time for the annual Spring Cleaning. My mom would take an entire weeks vacation from work and whip herself up into cleaning frenzy!

Personally, I look forward to spring cleaning, but like most, I can’t spend an entire week on the project.

Over the years I have learned not to try to do too much all at once. Here’s how I go about it: my system is to break down the tasks into smaller tasks.

I take a day to clean and reorganize each drawer in the house. I start by setting up some boxes marked toss or donate. I’ll go from room to room to sort, reorganize and clean each drawer. I take the items that are no longer needed or wanted and toss them into the right boxes. I finish my day with a trip to the Goodwill.

When I have another day I do closets, then onto cupboards (including the pantry) and so on. Again, I have my boxes in tow and finish with a trip to Goodwill.

I call this cleaning from the inside out.

After about three days of cleaning and sorting throughout the month I move on to other tasks like wiping walls and woodwork, which usually takes a day. Next up: vacuuming furniture, drapes or blinds, and having the rugs and carpets cleaned. I’ll take one day and thoroughly clean all of the bathrooms and another day to get down and dirty in the kitchen. Finally I clear out winter blankets and bedding, wash everything and store for the summer.

And, you know what I discovered? By tackling my cleaning in this way I found I really enjoyed it! It wasn’t so much of a ‘big’ chore as it was a series of smaller chores done over a month or so.

So, throw open the windows and doors and let the fresh air and sunshine in while you work. Take joy in the ritual – just do it a little at a time.

-Janna

Happiness is a De-Cluttered Home

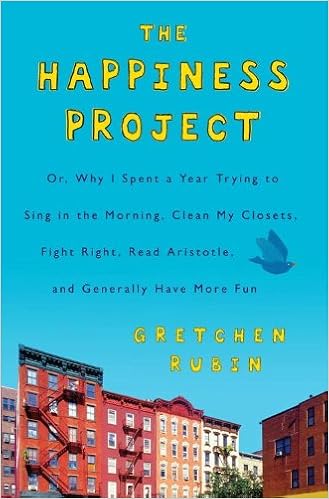
The Happiness Project

Can small changes in your life really make you happier? After reading Gretchen Rubin’s The Happiness Project, I believe the answer is yes!

For one year, Rubin sets out to read all she can about what makes people happy, and then test out several of the ideas as changes in her own life. Each month her changes focus on a theme, like friendship, work or marriage.

In January, the first month of her project, Rubin focuses on ways to boost her energy, and her changes include going to sleep earlier and exercising better. But she also adds organizing to her Jan plan…getting rid of the clutter that accumulated in the corners of her apartment, and also taking care of some long-overdue tasks.

Rubin guesses that creating “outer order…would bring inner peace” (p. 18) and that completing a nagging task would help clear her mental clutter. At the end of the January, after Rubin has cleared her clutter and To Do List, she shares, “I was astonished by the change of energy and satisfaction I got from creating order” (p. 37).

I love how she connects the idea of organizing to getting more energy. I’ve found the same to be true: crossing a critical project off my list or creating order out of chaos does create positive energy, and I tend to feel happier.

Can you use a new burst of energy in your life? Try 10 minutes a day of de-cluttering and tackling that nagging task and see how you feel.

For more on The Happiness Project, including online tools to start your own project, check out Gretchen Rubin’s blog.

Bag It!

Bags are an excellent and inexpensive organizing tool:

  • Use different bags to designate different activities; for example, my daughter has a school backpack, ballet bag, ice skating bag, and swim bag.
  • Bags can also help in other ways. We have a bag with stickers, paper, and small toys and games that we take in the car for short trips (when the DVD player seems like too much). I add things to this special "car bag" at random times so that when it comes out it holds some surprises. (This could be a good use for those small plastic toys from restaurants and birthday parties that seem to multiple in kids' rooms.)
  • Many families keep a bag just for library books.

How do you use bags in your home? Be sure to label the bags or use different colors/designs to quickly tell them apart. Then you can grab and go!

This was first published in The Neat Sheet newsletter. Sign up for the newsletter here.

Taking a Light Hearted Approach to Organizing

Another post by guest blogger, Janna Lufkin. Read her insightful take on being "too organized." (Is there such a thing?)

We hear a lot these days about “getting organized”. I saw the topic on many New Year’s resolution lists in January. It’s true, once you get yourself organized you quickly realize how much smoother your entire life runs.

However, I’ve seen the other end too – believe it or not, too organized! So much so that it makes it difficult to actually “live” in a home comfortably.

I think at one time, I fell into that category: a place for everything, everything in it’s place “QUICKLY” kind of approach worked best for me. But for my family? Maybe not so much.

For example, my daughter would come through the back door from a day at school, kick off her shoes, dump her backpack, lunch, etc. and be so excited to tell me about her day. I would listen (sort of) while whisking shoes into a bin, hanging up her backpack and cleaning out her lunch bag all in record time. In a flash, I had it done and would move onto my next task – usually dinner.

Fortunately, it occurred to me one day (hopefully not too late) that I was wasting valuable face time with her. I realized I was missing out on the big stuff – the important stuff - the stuff that really mattered.

We live in a relatively small home – a little less than 1900 sq.ft. and while it is ample space for three of us, in no time it can feel messy and disorganized if things don’t quickly migrate to their ‘homes’.

But how quick is to quick? Seconds from landing is probably too quick.

My solution: I learned to get things in order before I turned in for the night. I’d spend a few minutes, usually not more than 20 or 30, picking up, looking over schoolwork, making lunches, etc. Things were quieter then too and I found the time less stressful and even enjoyable. I knew that when I got up the next morning, things were organized and I could go about getting my day started quickly and easily.

Whether it’s getting your paperwork in order, getting your kids out the door in the mornings, grocery shopping, getting dinner on the table or cleaning up your house, take a step back and remember to actually “live” in your home. Your family will love you for it too.

Happy Valentine’s Day.

-Janna

A Valentine’s KISS = Keep It Super Simple

This month, enjoy time with your valentine…but why not also spend a little time getting organized for tax day on April 15th?

Preparing for taxes doesn’t have to be complicated, and often the simplest systems are the easiest to maintain. So this month, don’t forget another kind of KISS = Keep It Super Simple. Here are some KISS tips to help you organized before tax day:

  • Gather all the tax documents arriving in your mail, like W-2s, bank and mortgage interest statements, into one folder. Keep the folder near where you open the mail and as soon as you get these important tax documents, drop them in.
  • Collect all your receipts that may be used for deductions. I keep my personal deductions in a section of an accordion folder with my bills. I keep business deductions in a separate envelope in my office file cabinet. I have one client who uses clear plastic bags to organize her receipts, both personal and business. Throughout the year she finds a receipt, and puts it in the bag. It’s super simple, and it works!
  • If you have to do the same preparation process for taxes each year, make a list of the steps. After several years of preparing my business taxes for my accountant, last year I finally made a checklist of what documents I needed to gather, what calculations I needed for my home office deductions, etc.  I know that using my checklist will save me time this year.

12 Months Organized a Quarter at a Time

Read about my cousin Janna's great system for staying on top of projects all year long.

January is National Get Organized month….but I’ll bet you have something that needs to be taken care of every month of the year. By splitting the year into quarters, you can rest assured that you will make every monthly deadline and do it with ease.

For the past 15 years I have made the bulk of my living as a photostylist and producer for catalogs, magazines and advertising campaigns. So come January I’m actually thinking April, May and June. By Valentine’s Day I’ll be gearing up for July and summer-themed shoots. Come spring, I’m working on the holidays and spend most of my summer thinking ‘Winter Wonderland’ and by fall, it’s spring colors and ideas that cover my desk. The sheer nature of the business requires not only lots of organization and coordination, it requires me to think at least 3 or 6 months or even a whole year ahead!

So, years ago I started to organize not only my work calendar this way but also my personal one. By thinking ahead to what needs to be done at least three months ahead assures me that I will be prepared.

Starting in January I’m thinking about the second quarter of the year, April, May and June. The big item for all of us is taxes! So, right after I’ve wrapped and stowed the last of the ornaments, I’m up to the office with that April 15 deadline at the top of my “to do” list.

Here’s how I begin to organize my year:  I start with the givens and put them at the top of my monthly list. Next, I add things that I want to accomplish by the end of every month, along with family obligations, vacations etc. And, like you I have my daily schedule. As a freelancer, it changes a lot so being flexible and prioritizing is key.

For example:

QUARTER 1:

January = April EASTER (4th), TAXES (15th)

  • Organize, file and prepare for tax season
  • Plus:
  • Organize linen closet
  • Clean out clothes closet
  • Look for gifts for April birthdays (2)

February = May MOTHER’S DAY(9th), MEMORIAL DAY (31st)

  • Find Mother’s Day gifts (3)
  • Plus:
  • Valentine’s Day dinner
  • President’s Day Weekend
  • Clean and organize kitchen pantry
  • Buy May birthday cards/gifts (2)

March = June FATHER’S DAY (20th)

  • Find Father’s Day gift
  • Plus:
  • Spring cleaning/ kitchen
  • Buy June birthday gifts and cards (3)

QUARTER 2:

April = July INDEPENDENCE DAY

  • Plus:
  • 3 family birthdays (buy gifts)
  • Clean and reorganize garage
  • Garden clean-up

May = August BEACH VACATION!

  • Make reservations
  • Plus:
  • 1 birthday (look for gift)
  • Pick up daughter from college
  • Plant containers and window boxes

June = September ANNUAL LABOR DAY RODEO

  • Make reservations/buy tickets
  • Plus:
  • 2 birthdays (buy gifts)
  • Garden!

You get the picture by now I’m sure. I’ll also add these items to accomplish monthly to my third and fourth quarters;

July: Think about back to school

August: Decide on and organize holiday make ahead gifts

September: Garden clean-up, organize shed

October: Organize for the upcoming holidays

November: Finish holiday shopping, work on cards

December:

  • Week 1: Assemble “quick gifts”
  • Week 2: Mail gifts and cards
  • Weeks 3 – 4: Sit back, relax and enjoy

All too soon another year will be gone. If you adapt a quarterly calendar system and organize month-to-month by this time next year none of your “to-do” list will be undone.

-Janna

Make a Resolution to Back Up Your Data in 2010!

I had a really fun experience while visiting my mom over the holidays: we pulled out a number of old photo albums and I was able to show my daughter what Christmas was like when I was a little girl. As I was uploading my new holiday photos onto my computer, I wondered how she would be able to do this with her children someday. 

I love my digital camera and take a lot more pictures than I used to.  However, all of this convenience comes with some responsibility: you now need to make sure none of these memories are lost. I was reminded of the importance of this when my niece recently lost all of the photos from her first trip to Paris when the hard drive she had stored them on failed. Sadly, she did not have them backed up on any other device, so they were gone for good. In order to make sure your pictures (and other data) are safe and sound, you need a plan for data backup and recovery.

So in 2010, resolve to back up! To get started, here’s a guest post from Ian, my favorite “tech guy” (and husband).

The first step in creating a backup plan is making sure that it is painless. The more difficult it is to back up your data, the less likely you're going to do it consistently. Fortunately, there are many solutions available such as Time Machine if you have a Macintosh, or a Windows Home Server if you are backing up multiple Windows systems at home. Programs like these will automatically copy your data to another storage device (typically, another hard drive) automatically every night. They are pretty fool proof and you will be guarded against the possibility that the hard drive on your main system fails.

If you're doing something like this already, congratulations! You're doing much more than most, and this is a great first step towards guarding your digital life.  However, have you considered what would happen to your data in the event of a catastrophic event, such as a fire or a robbery?  Your photo albums aren't attractive items for thieves, but your laptop is. In our house, we've taken an additional step and have purchased an off-site backup service through a company named Mozy. For $4.95 per month, Mozy makes a complete backup of a single system's data every night while you're sleeping. Mozy also gives you the ability to recover any of the last 30 days worth of backups, so if you realize you deleted a file accidentally in the last month, you have the ability to recover it. Mozy also has a "try it before you buy it" policy, you can sign up for a free 2GB account to make sure you're comfortable with the service before trusting them with your backup. There are many other comparable services available, here is a link to a review of online storage services if you want to look at the other options available.

My backup plan really gives me piece of mind that I will be able to pass on my digital memories to my daughter. This year, resolve to back up your memories, and you’ll be able to enjoy them for years to come!

Ian Goodsell is a Senior Software Engineer by day, and tech guy for That’s Neat! Organizing by night. Check out his ramblings about technology and life at http://blog.iangoodsell.com/.

Time for a Toy Tune Up

This month is the perfect time for a tune up, a toy tune up that is! After the holidays it can be overwhelming to integrate the new toys into the mix. I try to take it slow, and put out the things my daughter really wants to play with right away. I put other items away for a snowy/rainy day, and then try to find a place for the rest. Inevitably this means some purging of old items, which is OK.

Last weekend my six-year old daughter and I purged her dress up clothes and purses, and her box of art supplies. I let her take the lead as my "client" and decide what she wanted to keep, what could be given away to another child, and what should head to the trash. She didn't get rid of a ton, but we worked together to clear room for some of the new special things. For example, her art table was a mess of old half-done projects and worn out supplies, so I said that if she wanted to use the new sticker maker and stack of coloring books she had to make some space.

It was also a good opportunity for me to see what items she really liked and what see didn't.  It is easy to forget that our kids' interest in their toys changes over time.

This may not work for all kids, but try to involve them in the process of what to keep and what to pass on/donate.

Set a timer for 20 minutes, pick one toy area, and see if a tune up helps you start the year off right!

Promises, Promises, Promises

Want to start the year off right? Enjoy this post by my cousin and guest blogger, Janna.

I promise if you adopt this simple, no-fail, multi-step program you will soon find yourself well on your way to a whole new…

Wow! Now that’s some promise.

How many ads with similar claims have we all recently heard? Ads that promise us a new body, a new job, a whole new whatever if only we would buy into their promises. And, why is it that this rash of similar messages always seem to crop up around the New Year?

Here’s my theory: these ads pray on our weaknesses. We all have them. And, right after the holidays many of us focus on these weaknesses and resolve to make significant changes. But why is it that our resolutions don’t seem to last? Personally I think it’s because we fail to understand that significant, positive changes are only successful if we adapt lifestyle changes. But to do this successfully, we must attack these tasks with know-how.

Well, I don’t know about you, but honestly the only one who would really know how to make changes for me – is me. And the only way they were going to work in my life is to work them into my life.

For me, to adapt real lifestyle changes, would mean organizing those changes and integrating them into my daily life. Hey, that’s what I’m good at – right?

Well, I decided to put it to the test.

For years I’d carried around an extra 25 to 30 pounds of weight. I’d lose some of it only to gain most of it back. It was one of my biggest hurdles. Then one day it hit me: I needed to organize a healthy lifestyle into my daily routine. Honestly, once I realized that’s all I had to do – apply what I’m good at to my problem – I could tackle it once and for all because it made sense to me.

First, I hired a professional trainer to get me started. Hiring a pro can often be the key to success in any situation. I made my appointments with her early in the mornings, that way I could work her into my day before my work day started. She gave me valuable information about nutrition, including how and what to eat and target percentages of fats, carbs and protein intakes for the day. She introduced me on to a great online program where I could input what I ate into a daily log that I keep on my computer. That’s easy - I’m in front of my laptop a good part of the day anyway.

But, the most valuable thing the trainer did for me was to tell me that I wouldn’t need her for long . We’d work together for a while (I met with her 2 days a week at first) and then she’d cut me loose.

Well she did her job – and I did mine. I hit the gym 4 – 5 times a week, still do. Early mornings work best for me. I gave myself a year to hit my new target weight but did it in 7 months. And not with a false promise but with common sense, good advice and a reasonable time line.

Since August I’ve kept it off and I plan to keep it off. And you know what? It’s easy. It’s easy for several of reasons: I adopted these changes into my everyday life; made lifestyle changes; and I did it because I applied something I’m good at – organizing - to my problem.

My point? Figure out how to organize the things you need and want to do into your daily life. The things you need to do will become second nature because you made needed lifestyle changes. And the things you want to do? They are your rewards for doing so.

BTW, I do have a 12-step (or rather – 12 month) process for you to ponder.

Stay tuned and Happy New Year!

-Janna

Get Organized in January!

Happy New Year! The National Association of Professional Organizers has deemed January national Get Organized month! What better time to make a fresh start and a plan to simplify, de-clutter and better enjoy life!

If getting organized is on your list this year, you aren’t alone. Once again in 2010, according to the Franklin Covey Resolution Survey, “get organized” is one of the top 10 resolutions.

Each January I take time to set goals and list what I want to accomplish in my business, and in other parts of my life (like what to tackle on the ever-growing household improvement list). Readers of my email newsletter, The Neat Sheet, may remember that last January I wrote about the importance of “resetting”—taking time to put things back in place or take care of regular tasks. My reset goal for 2009 was to set up a system to process and save my daughter’s artwork. While I improved in the processing of her artwork and projects, (i.e. saving vs. throwing out or sending to grandma) pretty quickly, it took me until last Fall to do the final sort of everything, and to find a good storage system. Once I accomplished this, I felt a great weight off my mind. And now saving and filing those masterpieces is super simple.

What about 2010? This year I want to focus on time: making better use of time to further my business goals, while also NOT forgetting to include time for myself.

I also plan to try and “sprint” to accomplish some personal and business projects that I’d love to get off my list this year. Taking a cure from my husband’s software development team, I’m going to “sprint” = focus on a specific goal for 2-3 weeks, then check in to see how I did. I’ll let you know how it goes.

I hope you will take time this January to set some goals to help you live a simpler, happier and more organized life in 2010. Best wishes!