Holiday Tips….2010??

Great post by guest blogger, Janna Lufkin. 

Yep, I’m already thinking about next year and nope, I didn’t roll out of bed at 4am December 26th to get to the post holiday sales by 5am. I can’t think of anything I’d rather not do! I think about December 2010 now, because I refuse to buy into the holiday hype and self-induced stresses many of us experience come the day after Thanksgiving.

But those old habits die hard. Often after the holiday hubbub is over, all we really want to do is ditch the tree, toss the lights in a box, stash the ornaments and slam the lid closed.

However, if you take a little time to organize your holiday collections, think about what you really need (should you have a burning desire to shop) and carefully put things away, come December 2010, you’ll have more time to enjoy the season and most importantly, each other.

Here are a few ideas to get you started…

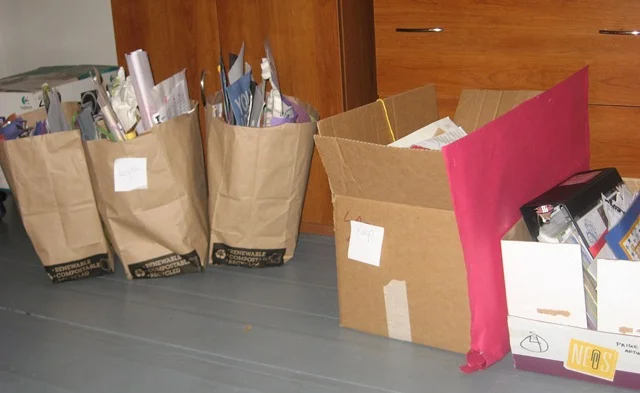
• Ornaments: They add up don’t they? Many of them have special emotional meaning. But just as many come through ornament exchange parties, tied to the tops of treat plates, etc. My advice: hang onto the ones you and your family have special memories attached to; give away or donate the rest. When storing ornaments, wrap each in tissue (I’ve re-used the same tissue for years) and carefully pack them in a sturdy flip top box. Tip: If you have kids, wrap their special treasures in tissue and store inside their stockings. That way, next year when the kids are dying to decorate and help, you can hand them their stocking and keep them busy while you get the tree in the door.

• Lights: Roll each strand up like a ball of yarn starting with the female plug end and store in a sturdy flip top box. You’ll find that putting lights on your tree will be a lot easier by passing a ball of lights around the branches instead of a messy, tangled strand.

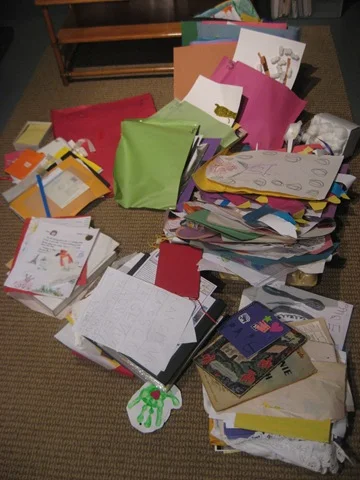
• Gift Wraps, Ribbons and Trims: I know, I know, there are some amazing deals out there. 50% – 75% off or more. Resist the urge. Instead, purge! Sort and store the wraps, cards and trims you have with your holiday decorations. Come 2010 if you need more paper, buy simple brown kraft paper and/or white butchers paper. It never goes out of style, can be used throughout the year, and it’s recyclable. With bits and pieces of the patterned wraps and ribbons you already have, plus a bit of creativity, you can have very simple yet stylish gifts under your tree.

• Gifts for next year: While it’s always a good idea to be on the lookout for special, meaningful holiday gifts, I’ve found shopping the sales right after the holidays may not yield that perfect gift. Often, by the time next year rolls around, tastes and interests shift and change and a good portion of the gifts I had purchased (because they were a good deal) are often not as relevant as they might have once been. Keep in mind that just because it was a good deal, doesn’t mean it’s the ideal gift.

That said, after-Christmas sales are a good time to pick up a few hostess gifts and small items to keep on hand for kids parties, etc. I store mine in a designated “gift drawer”. Whenever I need a quick something, I usually have it on hand.

December 2010 will sneak up fast. If you get organized now you’ll enjoy the season not stress about it.

-Janna

Holiday Help: Planning and Preparation Tips

Here are some of my favorite tips to help you have a more organized holiday.

  • Holiday card list: Many families love to send an annual holiday card. Instead of going through your address book or saving envelope labels, create a list of recipients on your computer. The list can be a simple MS Excel spreadsheet of names and addresses. Alternatively, addresses can be input as a set of labels using the mail merge in MS Word. Keeping your card list electronically will save you time next year, and allows for easy edits in case someone’s address has changed.
  • Gift list: Creating a list of gift recipients can help you stay organized and avoid  the last minute gift rush. Pick a date each year, such as the day after Thanksgiving or December 1st as the time to start working on your gift list. In addition to names and gift ideas, you may want to include a budget item next to each recipient. Ideally, create your list as a spreadsheet so you can easily update it. You can also keep a rolling tally of how much you have spent. With an electronic list you will have the template from year to year, and can also keep a list of what you give each year; this avoids the situation of giving Uncle Kevin the same tie or CD each year.
  • Gift center: You bought the toy your child wanted when it was on sale in October, and a special gift for your mom during summer vacation, but where are they now? If you purchase gifts during the year, or can’t find gifts you know you bought, establish a dedicated “home” for gifts. Use a clear box, such as the Sterilite ClearView boxes as your gift center. Keep your gift center in a closet or attic, and each time you purchase a gift, add it to the box. When it’s time to think about holiday gifts, open the gift center and see what you have – you may discover that you already have gifts for several people on your list!
  • Wrapping center: Wrapping gifts involves many different supplies such as wrapping paper, tissue paper, bows, gift tags, tape, and scissors. Searching for these items or purchasing duplicates can waste time and money. Keep all needed supplies in a wrapping center – a box, bin, or wrapping paper holder, such as the Rubbermaid Wrap N’Craft. If you like to buy wrapping paper or bows on sale after the holidays, having a dedicated wrapping center can help you avoid purchasing three rolls of the same kind of paper, but not having any gift tags.
  • Holiday recipes: Many families like to make special recipes for the holidays. In my family it’s gingerbread cookies, spiced nuts, and fruitcake. To easily find your holiday recipes each year, keep them in a dedicated spot: a colored folder, special section of your recipe file, or in clear sheet protectors in a binder. Keep the recipes in a place that makes sense to you: with your regular cookbooks, or with your holiday decorations for example. If you also make special food gifts each year, keep these recipes together in a separate file. If you find a recipe for a candy or cookies in a magazine in September that you’d like to make, cut or print the recipe out and place it in your file. When you're ready to get cooking, you'll be all set.

Stop and Smell The Roses

“Take time to stop and smell the roses” is an old adage, but one that was a poignant reminder for me today. It was a busy day, full of meetings and errands, and I was rushing home to move on to the next task before picking up my daughter from school.

I was feeling stressed and annoyed at all I still had left to do, but as I pulled into my driveway I noticed that our roses were blooming. Yes, roses blooming in December. In Boston.

We’ve had some warm weather lately, and the roses were open and beautiful. I went over to get a closer look and as I took a deep breath and smelled their sweet fragrance, I started to feel better and less stress.

Hmm, was the universe trying to tell me something? Maybe I needed to slow down a bit.

Although you may not have the opportunity to literally smell the roses like I did today, don’t forget to pause, take a breath, and notice the beautiful things in your life. It’s easy to get caught up in the holiday chaos, so this year, this weekend, remember to take some time out to slow down and enjoy what’s most important to you.

Happy (Organized) Holidays

Enjoy these holiday tips by my super-organized cousin, Janna Lufkin. Check out her great holiday products at Raw Materials Design

By the first week in December, I like to have a stockpile of small gifts packaged up and ready to go. I use them for hostess gifts as well as give them out when unexpected guests drop by. I pick an idea, and make them all ahead of time (often Thanksgiving weekend). I’ve got a jump on the holiday gift list and I'm ready for the season to begin.

This year I’m making homemade granola, packaged up in food safe bags then slipped into cute, inexpensive burlap bags. I’ll embellish the bags with a personalized gift tag and a sprig of fresh cedar from my yard. I stack my ready-to-go gifts in a container by my back door and grab one when I need it.

If you want to make some too, here’s what you will need:

  • A recipe. Here’s the Better Homes and Gardens recipe site - they have a variety of great granola recipes
  • Burlap bags and clear food safe bags
  • Transparent tape or decorative stickers
  • Gift tags (if you have time, make your own or have your kids help)
  • Ribbon and fresh greenery

Here’s how to make them:

  • Gather granola ingredients and make up as many batches as you think you’ll need
  • Once granola has completely cooled, place at least two cups (more if you like) into a food safe bag and seal with tape or sticker
  • Insert granola into a burlap bag (you could add the recipe if you like)
  • Tie with twine or embellish with a colorful ribbon
  • Tie on a tag and slip in some fresh greenery

It’s that easy.

A project done early gets you in the mood for the festivities ahead. It helps to eliminate some of the stress and it’s fun too.

The Art of Organizing Kids Artwork – Part III (DONE!)

IMG_6419.jpg

My project is done: the artwork is sorted and stored!  Though I recycled a lot, I still have folders full of my daughter’s masterpieces: one folder for each year to date. In addition, I kept some 3D sculptures, and a great scrapbook put together by her pre-school. All are stored in a plastic bin to protect them from water and dirt. This will be my archive in the attic. I have a small basket in the kitchen to catch the new things as they come in. I'll recycle what I can, and when that basket is full, I'll put what I want to save in my attic archive. 

Actually, this project didn’t take as long as I had expected. Three or four nights after dinner working on it and I was done. The longest part was that it took me four weeks to feel comfortable enough to recycle the art that didn’t make the cut. Admittedly, I looked through the recycle bags a few more times before finally letting them go. I know that what I saved is really the “best” and that it is plenty for us to enjoy looking at in the future.

Inspired by Janna’s post, I pulled out some of the seasonal artwork to display at the holidays. 

I was surprised to find a pumpkin very similar to the one made by Janna’s daughter. Here are the pumpkins created by our daughters…about 15 years apart! 

IMG_6376.jpg

A Recipe for Success: Two 30-minute Kitchen Makeovers

These tips were originally published in The Neat Sheet newsletter (Nov/Dec 2008) from That’s Neat! Organizing.

1. The Fridge: November is national "Clean out your Fridge" month. This is nobody's favorite task, but it is important for several reasons: getting rid of expired foods can keep your family safe and healthy; knowing what is in your fridge can keep you from purchasing duplicate items and save money; and cleaning out your fridge and freezer will free up space for holiday cooking.

Get started following these easy steps:

  • Gather supplies: gloves, sponge, cleaner, masking tape and marker for labeling items, and garbage bags
  • Take everything off the shelves and out of the drawers in your fridge. Wipe clean each shelf and drawer.
  • Pick up everything that you took out of the fridge; throw out any unidentifiable leftovers and expired foods.
  • Group the remaining items into similar categories such as drinks, dairy, veggies, and leftovers.
  • Put the items back in your fridge, keeping the groups together. Many fridges are designed to help with this by having drawers for meat, fruits, or veggies.
  • Follow the same process with your fridge shelves, keeping things together like peanut butter and jelly or marinades and sauces. Adjust the fridge shelves if necessary. Also, use plastic bins or a lazy susan to keep small items from getting lost in the back of the fridge.   
  • Now tackle the freezer using the same process. Take everything out, even food in the way back, and throw out anything that has been around for a year, or has a layer of permafrost. If you have food in containers, label each one before you put it back. Get into the habit of writing a description and the date on everything before it goes in the freezer. For two nights in the coming week, plan a meal using up foods in your freezer and fridge.

2. The Pantry: A well-stocked pantry is a must for cooking, but a well-organized pantry means you can actually find what you need quickly and easily (and help avoid those last-minute trips to the grocery store). Whether your pantry is a whole room or a few cabinets, try this quick fix.  

  • Gather your supplies: sponge and cleaner, small plastic bins, garbage bags, paper and pen.
  • Take everything out of your pantry and clean each shelf.
  • Sort the items into categories such as baking, spices, canned vegetables, pasta, and cereal.
  • For each category get rid of expired foods, items that are stale, and any empty containers. As you purge, make a shopping list of things you'll need to replace. 
  • Put items back, keeping categories together. Place foods that you use often, such as cereal and snacks, within easy access. Place foods that you use less often (or don't want the kids to reach) on higher shelves.
  • Use containers to keep small items together. Products such as Expand-a-Shelf can also help you find items in the back.
  • Consider labeling sections of the pantry to make it easier to find and put away items. You may have a section for snacks, pasta, or cereals.

Enjoy your re-organized kitchen!

Who Knew? Time to Organize your Fridge & Freezer

Great tips for organizing your fridge and freezer from guest blogger, Janna Lufkin.

Whoopie! Did you know that November is National Clean out Your Fridge Month? Me either… until Elizabeth informed me that I was ahead of the game (I cleaned mine last month)! Seriously? A whole month dedicated to the discovery of the icky, the sticky, the gooey and the furry? Yep.

Stuffing the turkey takes on a whole new meaning when you’re trying to make room for it in your over-stuffed fridge, so November is the perfect time to tackle this task.

I not only cleaned out my fridge, I went ahead and did the freezer too. Might as well, right? And I did something I’ve been meaning to do for years, create a Freezer Inventory Log so I know what I have and when I bought it. Now, I go to my “log” before I make my weekly grocery list. Brilliant!

My freezer log started out as nothing fancy. A small, re-purposed three-ring binder. I added a couple of dividers (I have an old fridge/freezer in my garage too), then divided the binder into Inside and Outside categories.

Next, I made a list of the items in each freezer and divided it up alphabetically and by the types of foods and added the date it was purchased. Note: Keep a marker by your fridge/freezer and write the date purchased on the item.

The Freezer Inventory Log is as simple as this:

INSIDE
Date: October 2009

Baking:
1 pkg. Pie Crust (9/09)
1 pkg. Puff Pastry (7/09)

Bread/Crackers:
1 Baguette (10/09)
2 Wheat Sandwich Bread (10/09)

Fruit:
1 pkg. (1lb) strawberries (8/09)

Beef:
1 pkg. Flank Steak (7/09)
2 Skirt Steaks (7/09)

Pork:
1 Tenderloin (9/09)

and so on….

Oh, and another discovery…once I did my binder I quickly realized I could just keep the list on my computer desktop (remember I’m older than Elizabeth, I did not grow up with technology). It’s easily updated and right there for quick reference.

Honestly, for someone who is perceived as being “so organized”, this one task had slipped by me for years. I can’t tell you how much food we’ve managed to eat up in the past month. Diver scallops – yum!

-Janna

The Art of Organizing Kids Artwork – Part II (Project in Process)

My artwork organizing project isn’t complete yet, but I’m making progress. I’m nearly done with the sorting stage. (Did I mention that after my Part I post I found another box of my daughter’s artwork in the attic, and two more boxes of mementos I had saved in her closet?!)

Here’s my photo of everything sorted, with the “recycle” pile on the left, and the “save” on the right.

Sorting is hard work, and it took me a while. If any clients are reading this: I understand what you go through when you are sorting and purging. Whether it is kids’ creations, shoes, books, model trains or soccer balls…it can be tough to let go.

What helped me in this case was time: I was ready, and the time was right. I probably couldn’t have purged as much when my daughter was in Preschool or Pre-K, but now that she is bringing home Kindergarten creations, I realize I don’t have to save every “purple crayon” drawing as Janna says.

Keep the best, and toss the rest.

Still to come: my final sorting and storage system. Read Part III: Done here

MIssed Part I: A Professional Organizer Reveals her Mess? Read it here

Preserving Paper by guest blogger, Gabriela Burgman

I'm pleased to have a guest blogger today. Gabriela Burgman, a trained archivist and professional organizer, shares her secrets for preserving special papers. In future poststo our blog Gabriela will also share tips for preserving fabrics and photographs. Enjoy!     – Elizabeth

j0430727.jpg

Often the paper in our lives is transitory. It comes into our homes bearing information we might need from never (junk mail) to forever (birth certificates). A majority of it will end up in the recycle bin. Some of it will end up in storage for awhile until someone else wants it or it loses value.

Today I want to share tips for storing paper that you want to preserve, from a few years to forever. When you begin thinking about storing paper ask yourself these questions:

  • How long do I want to keep it?
  • How valuable is this paper to me?
  • How many other people are going to handle it besides me?

How Long? Time is the enemy of paper (besides heat, humidity, and the environment). Some papers are made to last longer than others. For example, newspapers are created with the intention that you are going to throw them out in a week. This is why they tend to yellow and become brittle in a short period of time.

Paper will last the longest when it is stored in dry environments (so it doesn’t mold or stick together). Paper likes cool environments. When it is too hot, the fibers become brittle. Paper also likes non acidic environments. Acid is already present in its make-up as well as the pollutants in the air. It will slowly break down the fibers in the paper. If the papers are surrounded by folders and boxes that also contain acid, then the deterioration just accelerates.

How valuable is this paper to me?  After reading about all the coddling paper needs to remain around for a long period of time, you need to ask yourself is it worth it? For example, you only need to keep tax papers for seven years just in case you get audited. Since these papers have a short term value, just invest in plastic boxes to protect them from water and critters. Don’t worry about storing those boxes in a garage or basement, where the temperature will likely fluctuate, speeding up the deterioration of the paper: the environment you keep your taxes in only needs to be good enough to protect them for seven years.

Documents you consider priceless, on the other hand, such as birth/wedding/death  certificates, special news clippings, baseball cards, and children's artwork, need a bigger investment in their care if you wish to preserve them.

To preserve these kinds of papers, make sure your container and folders have been "buffered" (aka "Acid Free"). Buffered is when "the addition of alkaline agents such as calcium or magnesium carbonate during the papermaking process [is added] in order to counteract the effect of acidic contamination."* You can purchased buffered boxes and folders. In fact, some archives even put blank sheets of buffered paper between each document in a folder to halt the spread of acid contamination. Another good practice is taking newspaper clippings and photocopying them onto buffered paper which will last far longer than newsprint.

How many other people are going to handle the paper? If you know certain items are going to be handled repeatedly, you may want to go so far as to put each document in polypropylene (chemically stable plastic) sleeves. If not, then storing them in buffered containers is good enough.

Storing papers. After you have all your documents properly stored in their containers, you need to place them in a safe place free from humidity and temperature fluctuations. Often, the best place for your containers is on a closet shelf. By having the containers off the ground, you avoid the possibility of damage by flood water. The rooms in your home tend to maintain a consistent temperature when compared to your attic, garage, or basement. A closet is usually closed off to direct sunlight and if you are storing clothing in these closets, you are already making sure that insects and humidity are not affecting the items being stored.

Resources. Here are my favorite resources for products mentioned to help preserve your special papers:

If you would like to learn more, I highly suggest visiting the website for the Northeast Document Conservation Center.

*Pasted from <http://www.lightimpressionsdirect.com/glossaryoftermspage.action>

Gabriela Burgman, owner of Claiming Space professional organizing, holds a BA from Mount Holyoke College and a Masters Degree in Information Science from the University of Michigan.  She has worked in colleges and universities for six years as an archivist and a records manager, assisting academic offices, administrators, and retiring academics sort through their files for preservation or disposal.

The Art of Organizing Kids Artwork - Part I: A Professional Organizer Reveals Her Mess

I’ve written in The Neat Sheet and in this blog about how I need to get my daughter’s artwork, special creations, and mementos under control.  While I’ve purged as we went along I still have a lot saved…and it’s now spilling out from where it was piled in the attic hall into the guest room. Yes, even Professional Organizers have a dirty little secret project they need to deal with.

This has been one of those projects, and was nagging at me for months. So today I decided to start. Perhaps it was the cold medicine wearing off, or the fact that I had the whole house to myself for the afternoon, but I dove in.

I’m now in sorting and purging mode. See the mess I’ve made already? As I tell my clients, it often looks worse before it gets better. (NOTE: Several of the piles pictured are 6 inches high, and there are stacks of artwork in portfolios from the pre-school that need to be sorted and paired down. Oh, did I mention my mother is an artist who creates beautiful cards and illustrated letters for my daughter? These I want to keep…once I can dig them out.)

Later, after the sorting, I’ll work on the containers for the pieces I want to save. Thanks to Janna’s posts, I have more ideas.

Hopefully within the next month I’ll have my system set and can post the “After” picture.  Wish me luck, and stay tuned!

Part II: Project in Process

Part III: Done!

Clear the Costume Clutter

I’ve always loved Halloween, and as a kid my favorite part (next to the candy) was figuring out what I’d be. Some of my favorite costume creations were Little Bo Peep; a flapper from the 1920s using a dress from that era that was in the family; and a witch with layers and layers of black skirts which were castoffs from a local Shakespeare theater. My family tended to create costumes from things we had. Today there are many more options for purchasing ready-made costumes…but what to do with the costumes after the trick-or-treating?

First, reduce the single-use costume clutter by using what you already have to create an outfit. Recycle pretend-play clothes (fireman, princess, chef) or dance recital outfits into a costume. When Halloween is done, the costume pieces can go back to being dress up clothes.

If you have lots of old costumes taking up space (especially  valuable closet space) take the time to sort and purge. If you’ve taken pictures of your kids in the costumes as they’ve grown up (and most of us have), all the more reason to let some go.

As you sort, consider saving a few costumes that fall into these categories:

1. Costumes with special sentimental value (“her first costume”). Be sure to store these costumes in a labeled box or bin so you can find them later on. You may even want to use an archival box or tissue paper if you really want to preserve them. 

2. Costumes or accessories that your kids can still fit into or may play with. Keep these together in a special box or bin. Then take the box out on rainy/snowy days for dress up and pretend play. See what crazy combinations of costumes and accessories your children can come up with. The costumes might seem more magical after they have been out of sight for a while. Growing up, my family had a box like this in the attic and it was really fun when I could go up and and see what was in the “costume box.”   

For the costumes that you no longer want, donate them to a charity like Goodwill or The Salvation Army. You can also sell costumes to some consignment stores, or sell them yourself online.

Another idea is to hold a pre-Halloween costume swap with families who have kids of similar ages. This could become a yearly tradition…and even an excuse for a fun family party.

What ideas do you have for costumes after Halloween? Post a comment or send me an email. Happy trick-or-treating!

It’s Here!

In this guest post, my cousin Janna shares how she gets her fall decor to do double-duty. 

“Halloween, Halloween, oh what awful sights are seen. Witches hats, coal black cats, broom stick riders, mice and rats!”

This little ditty, taught to me when I was a kid by our Crazy Uncle Ed, (as we all refer to him) is a favorite. I’m not sure Elizabeth knows this song, she wasn’t born when I learned it. I taught it to Kate when she was little. Come October, it continually runs through my head.  Thanks Crazy Uncle Ed!

I love fall, especially October, because it’s Halloween! Anybody who knows me, knows it’s my favorite day of the year.

I simply can’t wait to decorate. My selections are simple. Pumpkins for sure (I’m partial to the white ones but I always have a few orange too), and of course my collection of crows. I even have a really big nest. My aunt sent it to me years ago from the farm in Idaho. I keep it in the house year round. Come October, the nest takes center stage. I perch it on an old wooden stand, right in the middle of my dining room table. Cute Jack-Be–Little pumpkins, stacked in the nest and my big plastic crow make for some great conversation. Who needs anything more?

Well, I do, just a little.

While perusing the pumpkin patch, farm stand and grocery store, I keep in mind the next holiday that comes upon us quickly: Thanksgiving.

I’ll pick up a few extra pumpkins, gourds and a variety of squashes and add them to my Halloween display. I often add leaves and acorns from our yard as well. Once Halloween is over, I pack away my crows but for the most part, the rest can stay. The house looks nice for November and I have what I need to set a pretty Thanksgiving table.

During the fall season, right into winter, we eat most of the squash. If you keep them in a cool and dry place, they will last long after the holidays are over.

Now where did I hide those little candy bars….

-Janna

Fine Art – Part II

In this second installment by guest blogger, Janna, she reveals the system she set up for her daughter's artwork and school papers.

When Kate was little, she created a “masterpiece” (or more) a day. I loved them, hung a number of them on my ‘fridge or in my office and saved them all. Once in awhile I’d pull out a really special one, frame it simply and hang it on the ‘art wall’ that was located in our center hall.

That art wall made us smile everyday and Kate was so proud to have her work on display. Her friends would come to play and comment, “you have your own art wall”! It was there until we knocked it down as part of the remodel.  A happy and sad day all at the same time.

I knew all of those pieces were created with every bit of Kate’s heart and soul. This was probably the only organizing project where I saved more than I tossed. However, I did come to realize some pieces were awesome stand-outs and some were not.

In yesterday’s post, the story I told helped me to organize this often overwhelming task.

Here is the system I created for sorting, saving, tossing and archiving all of those special projects. One day, I’ll pass it all on to Kate. My hope is that the system I created will help her to decide what to do with it all.

1. Date everything! Each time your little one hands you a ‘special piece’, write the date on it. If you start now, it will make filing so much easier later on.

2. Sort. This is the hardest part. But, as I mentioned above, some things are stand-outs and some are not. Every piece of paper with a crayon stick drawing or a paint swash, while special at the time of it’s creation – may not really tell the story later on. I found I had saved a lot more swashes and crayon marks than I had masterpieces! Soon, sorting and archiving became less daunting.

3. Once your special pieces are sorted, make piles for each year. Some things will be much larger than others.

4. Purchase a variety of envelopes, flat portfolios (or make some with large cardboard, bookbinding tape and a few pieces of ribbon for each), and labels. Local office supply stores have good selections.

5. Label each portfolio with the year. You will quickly notice, that as the kids get older, the artwork, papers, etc. become less frequent! You’ll find that you can combine years. Just remember to label each portfolio appropriately.

6. Group smaller pieces into suitable sized envelopes. Date and label their contents and slip into the correct portfolios.

7. For pieces that are not flat, (the hand print in the plaster for instance,) either make a pocket on the front of your portfolio or create a box for these special items. Date each item, label the box and keep it with the rest of the archives.

8. Keep all of the portfolios in a convenient to get to space. If possible, keep your archives in your home where the temperature is a little easier controlled.

That’s it! It really is that simple.

A few things to note:

  • Once the kids have grown and you feel it’s time to pass down the archives, select a few of your particular favorite pieces and hang onto them. Display them once in awhile and revel in the memories.

Finally, visit your archives often. At different times during the year, I’ll pull out a special little ‘gem’ and put it in my kitchen window or on my desk. For Halloween I always seem to select the same one. This year in particular, it’s a dear reminder of my college freshman, a special memento that always tugs at my heart.

-Janna

Fine Art – Part I

In this guest post my cousin Janna shares her ides for organizing her a child's artwork and school papers.

About five years ago, on a cold winter day, I decided to sort and organize my daughter’s school artwork, journals and special homework assignments. It was one of a number of projects I needed to tackle to prepare for our upcoming home remodel.

As you can imagine, it was a delightful trip down memory lane, but a sad one too.

Imagine my guilt as I forced myself to cull through all of the “special” pieces, making piles to save and a pile to toss.

I kept thinking about a large envelope I received when I graduated from high school. It was from Elizabeth’s mom, my aunt Janet.

It contained artwork, letters and other special mementos I had sent to her during my childhood. I remember receiving that envelope and how fun and funny it was to look through it.

I still have it. And every once in awhile, I run across it in my family archives desk. I pull out its contents and have a good laugh.

Over the years, I too have saved a few special things from nephews, nieces and small cousins. I plan to do the same for them, a lovely family tradition – don’t you think?

It will be up to them to decide what to do with it.

And that’s the point. No matter how hard we try to clean up, sort and organize, there are some things that are just too difficult to decide upon.

Janet’s solution was perfect. She did her best, culled out her favorites and sent them back!

I am forever grateful for her thoughtfulness and her forward thinking.

   Coming Next: Part 2 – My system for organizing the artwork

-Janna

School Papers—Contained!

I’ve written recently about purging and preparing for the onslaught of Kindergarten papers. A month into the school year and there is a lot of paper coming home. After trying a few different systems, I seem to have found one that works for me.

When setting up a paper management system, I try to work with my clients’ natural tendencies for where they put things (as long as it isn’t the floor!). In my case, the pre-school papers and artwork seemed to congregate on one counter in the kitchen…probably because this is where we’d unpack the school bag to clean out the lunch containers. Following my own advice, I designated this corner as the official School Paper Zone.

I felt better knowing that the pile of papers in the corner now had a reason for being there. But I was still bothered by the pile. So I went one step farther: instead of just having the papers and artwork piling up and annoying me, I decided to try and contain them (again, following the same advice I give my clients) in an inexpensive basket.

In the back of the basket is my Family Information Binder, which includes a section for critical school information like the class list and calendar. Next comes a few pieces of papers that I’m referencing all the time, such as the school lunch calendar and a helpful tip sheet from the teacher. These papers stand up in front of the binder so I can grab them easily. In the front of the basket I’m stashing the art and projects that come home from school. This is a small space so I’m hoping it will force me to go through the masterpieces every week. (More to come on the artwork organization project.)

I’ve found that the basket serves several purposes: 1) it contains and limits the papers—if they don’t fit, I know I need to purge; 2) it looks nice and now this corner doesn’t bother me; and 3) it is easy to move if I want it temporarily out of sight because we are having a party or some other event.

This was a very inexpensive and simple system, even though it took me a few tries to get it right. Don’t forget that simple is often better, and don’t give up if you can’t find something that works right away.

Out with the Old, In with the New: Organizing for the College Years

More ideas from my cousin Janna on how to stay organized while your child is in college. 

This project was quite possibly the easiest organizing project I’ve ever done. In the span of about 10 minutes I had it finished.

Late in June, we attended college orientation at the University of Montana. After attending the three-day event, we knew this was going to be the perfect place for our daughter. It was obvious the university had perfected their sales pitch and by the last day we were happy to send them both our daughter and our hard-earned dollars.

We were all impressed by many of the presentations and fun activities, but what sealed the deal for me was how organized they were!

Now it’s September, she is finishing her first week as a college student, and I spent a few minutes setting up some new files. As far as I can tell, my new system (based on my old one) will take me right through to graduation.

It was simple, here are a few things that make it work:

  • Clean out the high school papers, calendars, and other documents. File and store the important stuff like report cards, certificates and photos with your family archives.
  • Set up a new system using information from the college. For example I set up files that include topics such as: calendars; banking; books; business services (how to pay our bill!); contact information (phone numbers and email addresses); health care; housing; meal plan; and scholarship information.
  • Keep the files handy. I keep them in the top drawer of our file cabinet where I file our monthly paid bills, etc.

Unlike Elizabeth’s system, mine is based on old technology and a system I developed when our daughter started Kindergarten. But, it works the same, it’s handy and it’s easy for me. Isn’t that what it’s all about anyway?

-Janna

Elementary, My Dear Organizer

Soon my daughter will head off to Kindergarten and I’ll be the parent of a child in elementary school! How did that happen?

My mom friends who have been through this already have warned me about the onslaught of school-related paperwork and emails. This was high on my list so today I started to prepare. Here’s what I did:

  • Purged and recycled nearly all the paperwork from the file folder for my daughter’s pre-school…saving only the progress reports for posterity
  • Purged all the pre-school papers out of my Family Information binder
  • Scanned the pre-school class list to my computer so I can keep all the contact information (for future play dates) but get rid of the paper
  • Put the Kindergarten class roster and school calendar into my Family Information binder for quick reference
  • Added all the dates from the new school calendar to the Google calendar that I share with my husband (I LOVE Google calendar)
  • Set up a folder on my computer for my daughter’s new school and downloaded some important information from the school’s website

Hope I’m ready!

Off to College: Cousins Compare Notes

j0442214_thumb.jpg

In this post my cousin Janna shares how she's getting organized for sending her daughter off to college. 

School is coming up fast. For the past year, we’ve been organizing, planning and anticipating what will be a milestone.

Unlike previous years, I won’t listen for the bus at the bottom of our hill – my husband and I will be driving our own bus (ur-a-bus, or Subaru spelled backwards), and our daughter Kate east over the Cascades to Missoula and the University of Montana.

Despite the new location, there are many similarities with her first day of Kindergarten, thirteen years earlier. Back then, we carefully studied our school options and made decisions with her best interests in mind. Now, she’s plotting her own course.

We’re nervous and excited all at the same time.

The first time she rode the bus to school, standing with her at the bus stop a half a block down our hill, was almost agony. Now school is 480 miles and a time zone away. Just like elementary school, we’ve been through orientation (3 jam-packed days worth!), and as then, we’ve met some wonderful people who will surely become lifelong friends. Once again, we’ve bought back-to-school supplies. But instead of pencils and filler paper, now she’ll need a microwave oven, bedding, and her own computer printer.

Unlike grade school, she won’t be coming home every afternoon.

It’s often said that the more things change, the more they stay the same. Things are indeed changing. Our little girl is growing up and ready to strike out on her own. But a lot will stay the same too.

We’ll always be here for her, as will her room, her favorite stuffed animals and memories of her childhood.

We’ll continue to encourage her to explore, to love to learn, learn to love, spread her wings and be confident and independent. We’re just as proud of her now as we were that very first day of Kindergarten.

- Janna

Off to Kindergarten

My cousin Janna and I each have one daughter, and our girls will be embarking on new school adventures this fall…though at quite different points. My daughter is starting kindergarten and Janna’s daughter is starting college.

Our girls are on different coasts, at different stages of their education, but both transitions require organization. These next few posts will highlight some of the ways we are getting organized.

I’m approaching this kindergarten milestone like I do most important projects. First, I gather information. I’ve been talking to my mom friends of older kids to get their input on what I should be doing. I love learning from others and have already gotten some great advice.

Second, I’m making a list and checking it twice. Here are the big topics on the list:

  • Paperwork! I know there will be a lot of paperwork from the new school. To get ready I know I need to clean out my files from the pre-school so this is at the top of my to do list.
  • Planning. I need to set aside some time to read through all the paperwork we’ve already received. I think there is a parent-teacher meeting before school, and some other important dates I’ll need to put on the calendar.
  • Purchases. I’ve jotted down the key things we need to purchase before school begins. From basics like a big-girl backpack and new lunchbox, to something special like a new outfit for her first day. I’ve started to schedule time on my calendar for shopping to ensure it really happens this month.
  • Projects. Everyone, even a professional organizer, has an area they need to to work on. Mine little secret project is the pile of artwork and school mementos from my daughter’s past three years of school that I’ve accumulated. I have the art folders from nearly every month, in addition to lots of other special projects. I want to get this organized before she starts school. More on this to come.
  • Play dates. Our town has a great family network which runs meet-ups for kindergarten families. I’ve got those on the family Google calendar, and plan to call a few other parents to set up some play dates.

That’s my strategy to keep it all together this month. Let’s see how it works!

Is There an Organizing Gene?

Being organized seems to run in my family. My cousin Janna is super-organized, and she credits that to her mom and our Grandma Nell. I'm sure that I’m as organized as I am because of my mom. Here is what I learned from her:

  • Make a list.
  • Always have paper and a pen handy….in case you need to make a list.
  • Use a calendar (mom’s calendar always hangs in the kitchen and contains all the key family events, birthdays, and things to do).
  • Put things away when you are done.
  • Use labels.
  • Make things beautiful.

Although she didn’t explicitly teach me these strategies, they became ingrained in how I approach my life. Maybe it was seeing the behavior as normal in our home; maybe it was that organizing gene.

Now I see my daughter exhibit a natural inclination towards organization. As a toddler, she taught her classmates how to sort the dried beans by shape and color. As a pre-schooler, she loved to “organize” the dress up clothes at school. Nearly six, she likes to plan ahead for what she’s going to wear the next day. She knows where to put the library books that need to be returned. She loves to have things sorted and categorized. And with reminders, most of the time she’ll put away her toys. Yes, I’m a pretty lucky parent.

Whether it comes from nature, nurture, or both, I hope these organization skills help my daughter navigate the world of elementary school, and later in life.

Please don’t despair if your child doesn’t seem to be naturally organized in the traditional way. Even if your child doesn’t seem to be innately organized, you can model positive organizing behavior. Read some ideas in The Neat Sheet.

Another resource to read is Every Child Has a Thinking Style by Lanna Nakone. This great book details four different organizing styles based on distinct “thinking styles” to help you work with your child’s strengths and recognize their challenges.