Digitize and Organize your Photos - at home!

Do you have boxes of loose photos taking up space in a closet or shelf? Recently a friend of mine asked for help to reduce the amount of photos she had. We brainstormed some options, and developed a plan.

First, she got rid of blurry, boring, and duplicate photos, reducing her stash down by at least 2 photo boxes. Next, to reduce even more, she decided to digitize some of the oldest and most precious photos using a cool new machine, called the Wolverine Photo Digitizer. Here's what she says:

The Wolverine Photo Digitizer is available on Amazon for about $62. I got this product in the hopes that I could reduce the number of paper photos I had to store. They are nice memories and ones I don't want to lose but not photos really worthy of a book. I thought if I could digitize them, I could let go of the paper copy, free some space, and still have the digital copy available to me. 

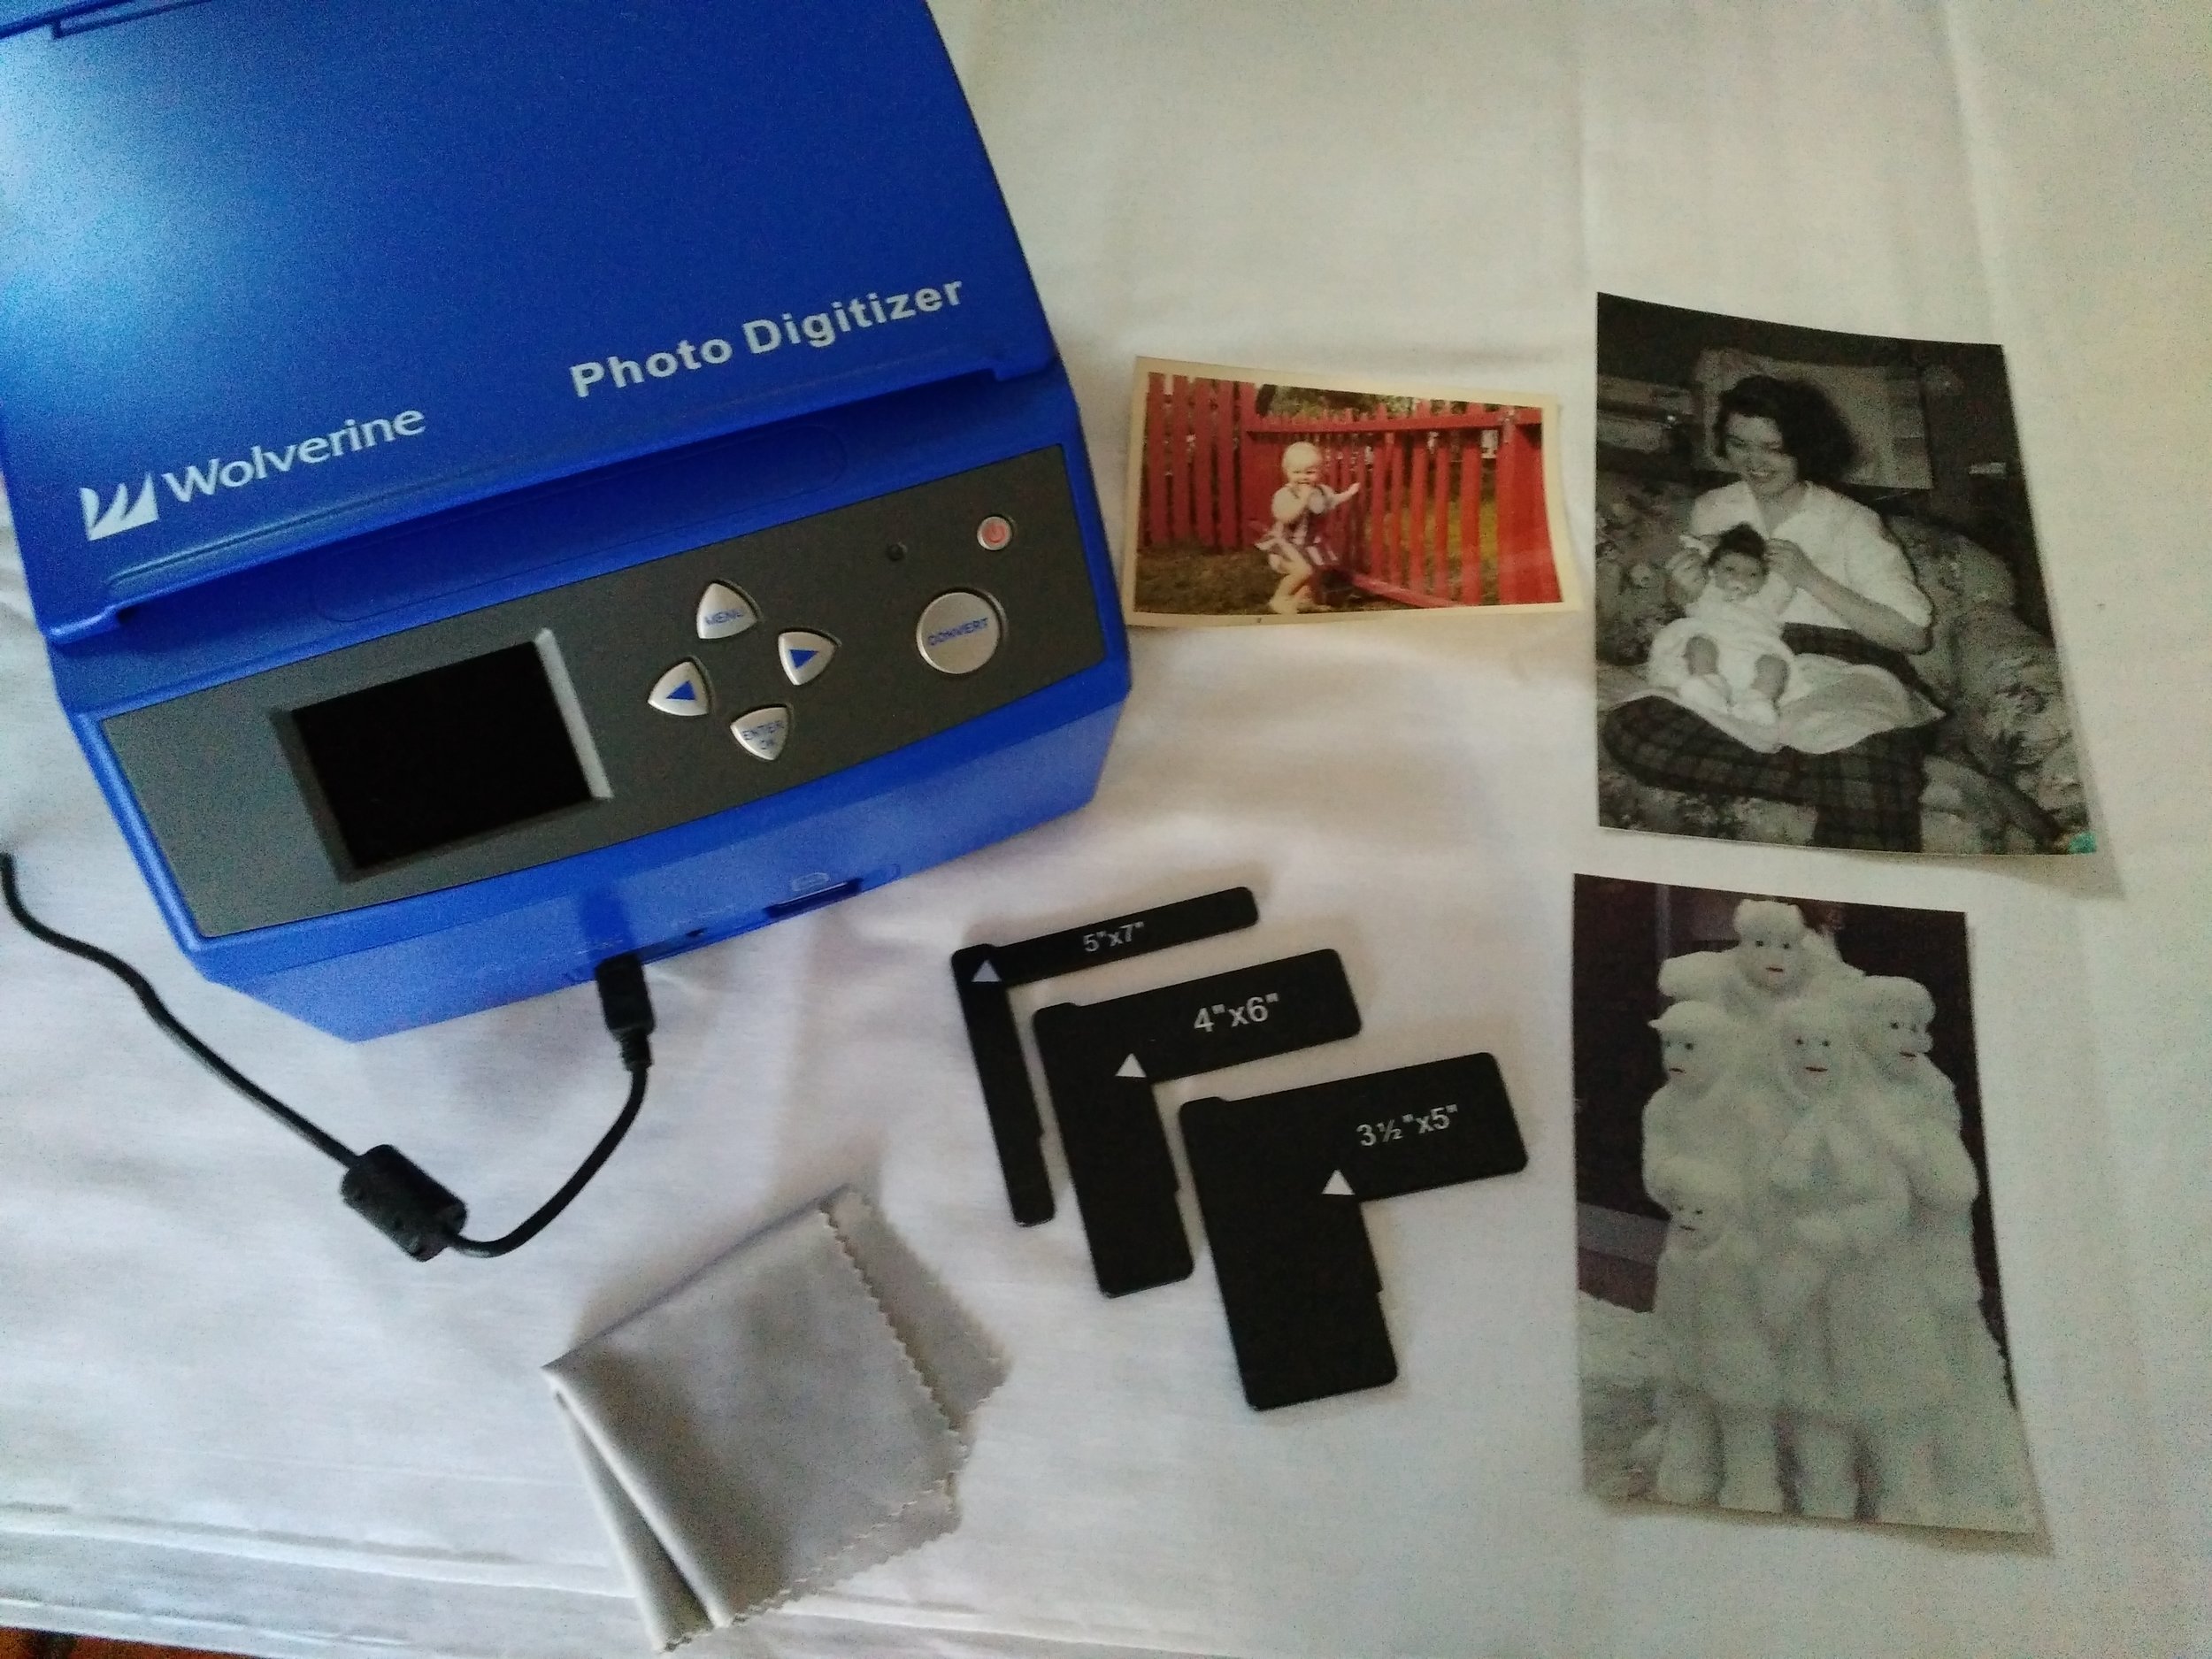
You can see in the photo (right), you get the digitizer (approx 9"x9" and very lightweight), 3 photo size brackets, and a lint-free cloth. Not shown is the instruction book. They don't provide an SD card but the device can store up to 35-40 images without a card.  

It's simple to use and the process goes very quickly. I digitized over 1,000 photos in two sessions. Make sure you have a comfortable place to work that will be easy on your back. It's important to take breaks and stretch as well, because it's easy to get into a groove and just keep going without realizing what you're doing to your back.

Getting started: It's a good idea, if you have quite a few images to digitize, to separate them out by size. I had a variety of 3x5, 4x6, 5x7, and wallet sized photos. 

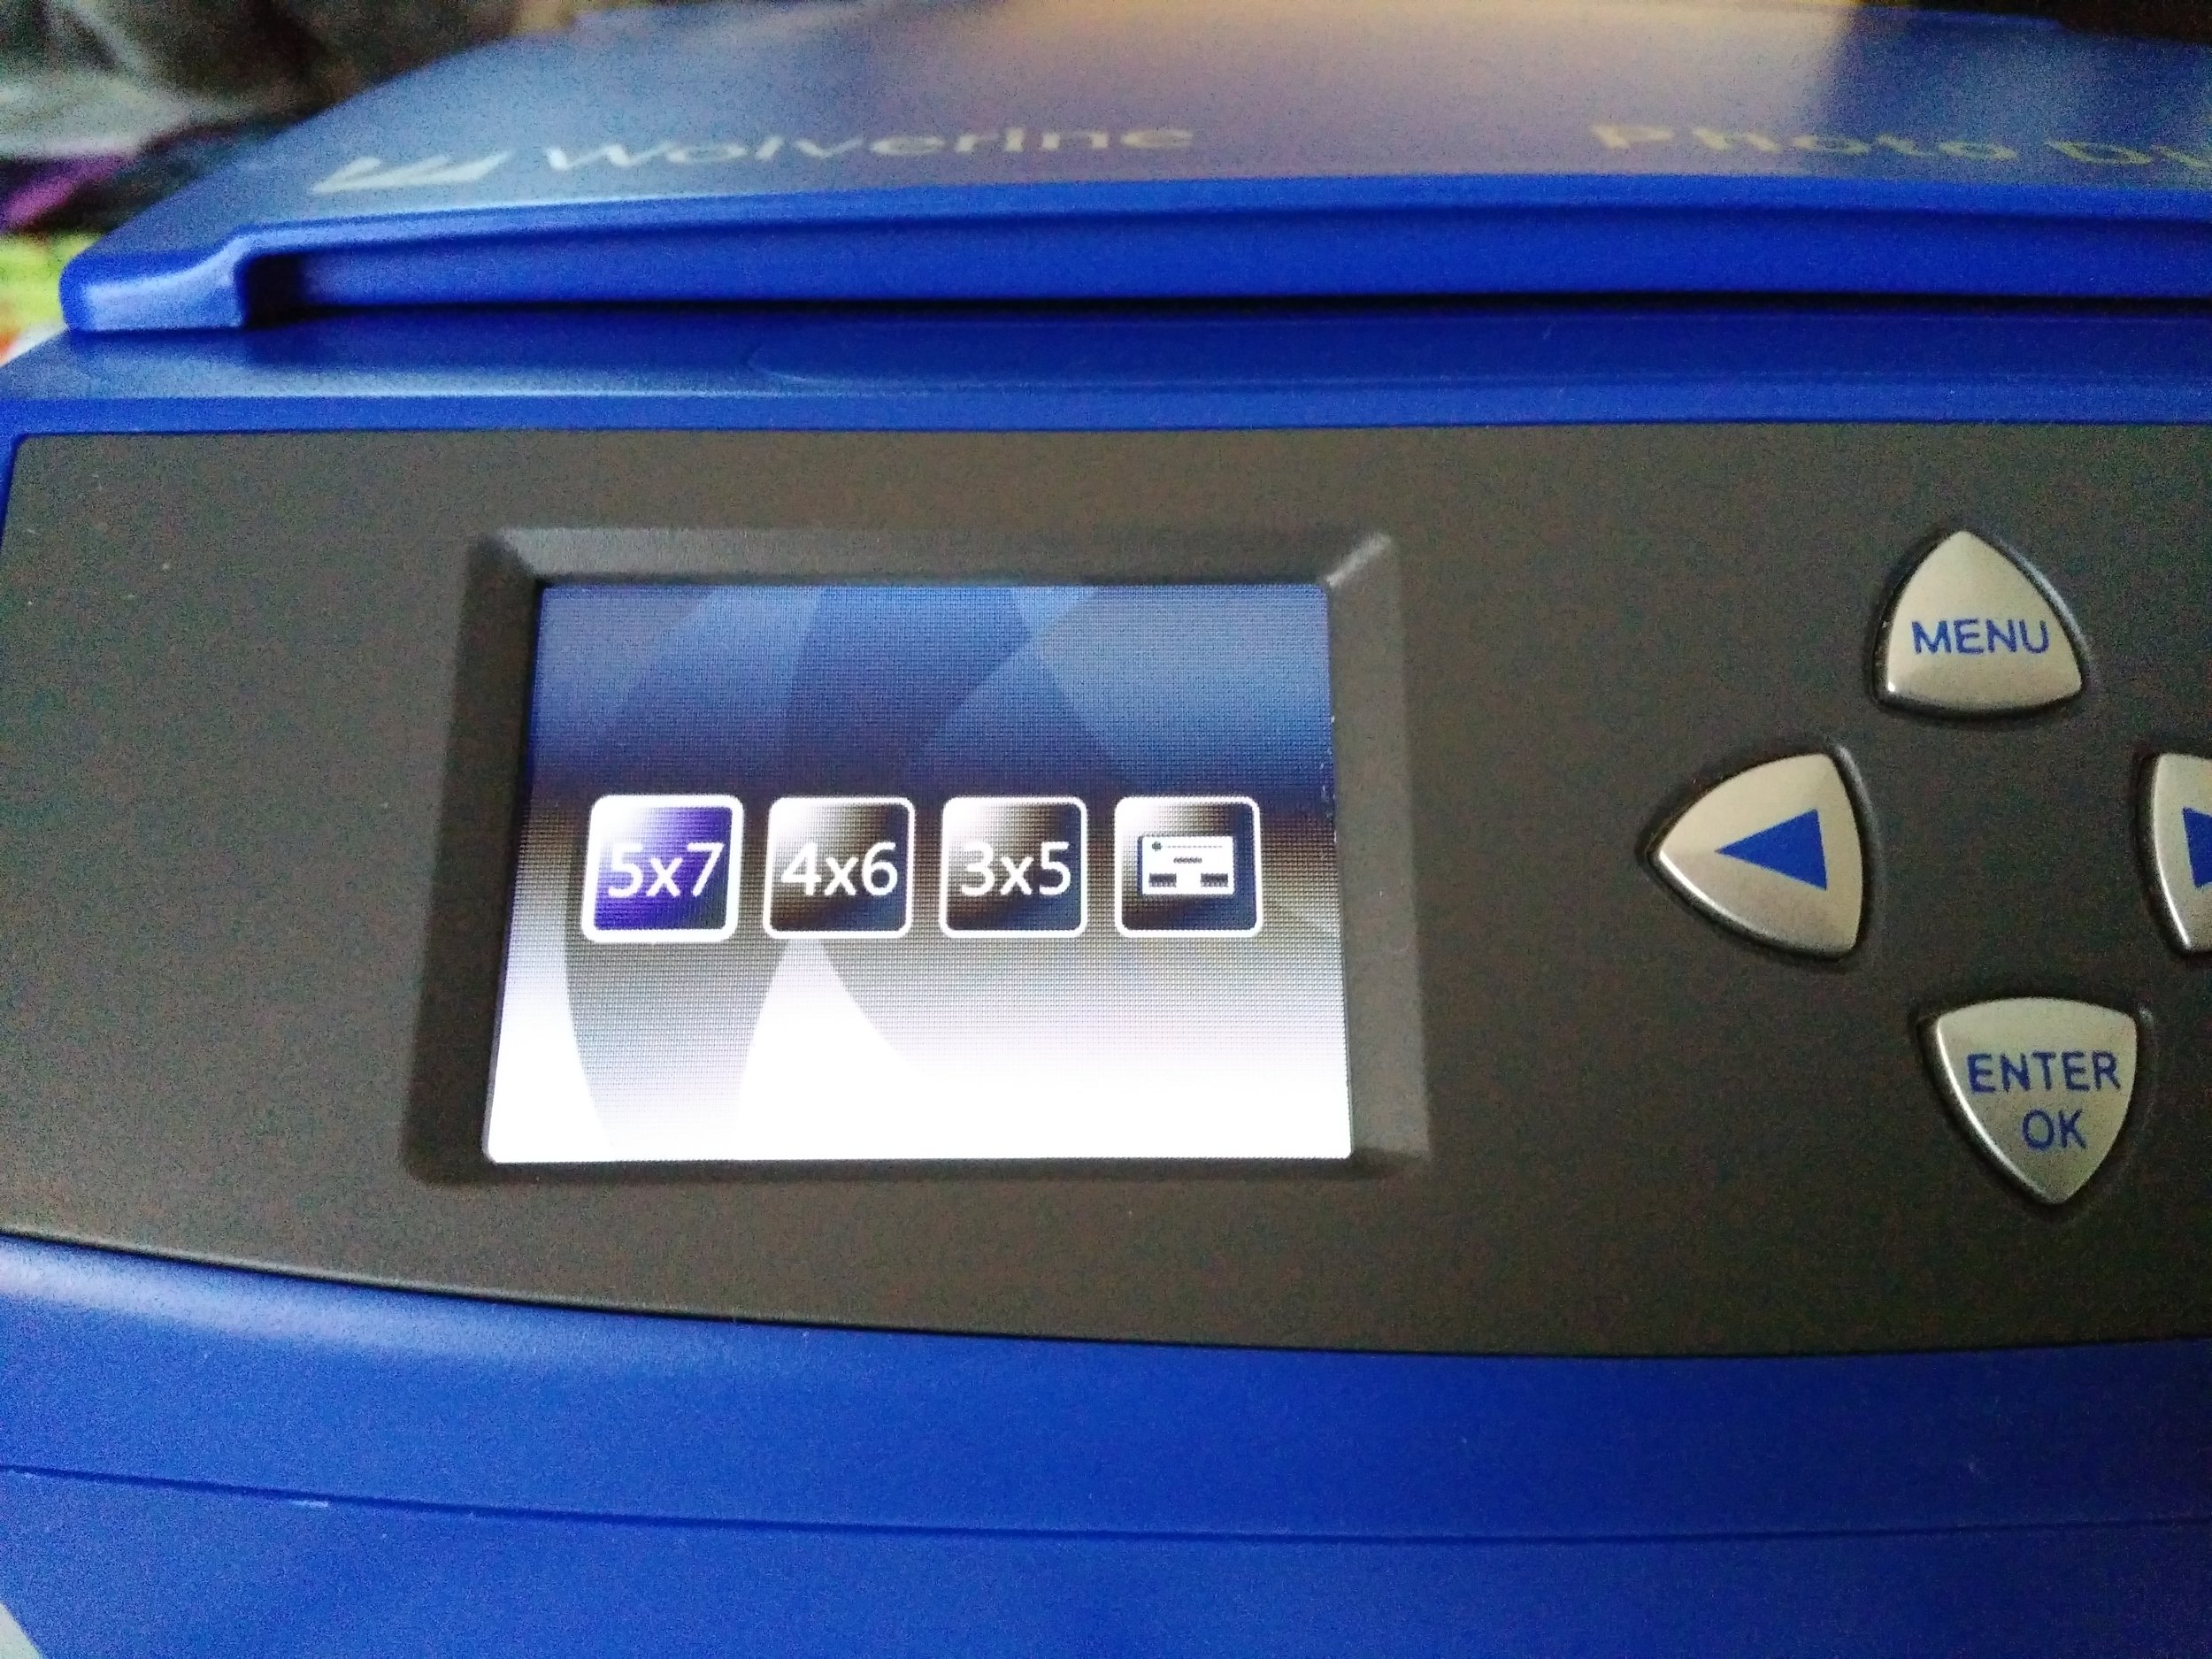
Digitize: Once you're ready to begin, insert your SD card then turn the machine on. Press the menu button until you see this symbol. Hit Enter, then arrow to the right or left to get to the size photo you want to digitize. Hit Enter to select it. 

I've started with the 5x7 photo. Place the photo size bracket into the upper left corner into the slots, and align your photo into that bracket corner. Close the lid and press Convert, then Enter. It takes approx 5-8 seconds for the photo to be digitized.

You can see the "progress wheel" turning on the screen. Repeat that process for the 4x6 photo making sure to change out the photo size bracket and to change the photo size in the menu.

And repeat the process once again for the 3x5 photo again making sure to change to the 3x5 photo size bracket and change the photo size in the menu.

Hints: I highly recommend you use an SD card for this if you have more than 35-40 photos to convert. There's a slot for it right in the front of the machine. 

Also, they really mean it when they recommend you clean the glass often. I have many photos with dust particles on them from not cleaning the glass often enough.  

Final Assessment: Overall, I'm pleased with the Wolverine Photo Digitizer. The quality of the digitized photos varied. Some were not as clear as the original, or the lighting was different, or they just looked like well done photos of the photos. For my purposes, to have a digital back-up of paper photos that don't require great quality, it worked really well. If I wanted a good quality digital copy of a special photo, I would still take it to a shop that specializes in that.

20180121_212227598_iOS.jpg
Wolverine and accessories

Wolverine and accessories

Photo size and crop

Photo size and crop

SD card

SD card

Select size of photos

Select size of photos

Progress bar while scanning

Progress bar while scanning

5x7 Photo on scanner

5x7 Photo on scanner

Recipe Organization: There's an App for That!

We all love to cook in my house, so we have a good-size collection of cookbooks and a few favorite cooking magazines. I also have lots of paper recipes I've saved from websites and torn out of of magazines. My recommended method for keeping paper recipes is a binder system.

If you have folders or boxes of recipes and want to get rid of the paper, consider digital options:

  • Pinterest: While I wouldn't trade all my paper recipes for electronic versions, I have come around to using Pinterest. I've got all kinds of recipes pinned and categorized. I love how easy it is to use, and so visual. 
  • Paprkia Recipe Manager: This app works on all your platforms, and includes cool tools like built-in timers and the ability to cross off ingredients as you use them.
  • All Recipes Dinner Spinner: I often find recipes for a specific ingredient on the All Recipes website , so it makes sense that they offer an app. The app includes shopping lists and you can sort by favorite recipes or type of food. 
  • Your phone's scanner: You can also use your phone to take photos or scan paper recipes you want to save.

Receipt Organization: The Shredder Solution

While working with a client to de-clutter his bedroom, we discovered that one problem area was receipts. Like many men (my husband included) the client emptied his pockets in his bedroom, which meant that change, small papers and receipts ended up on the flat surfaces, stuffed into drawers, and all over the space. We brainstormed strategies to keep the surfaces clear, including bowls to hold change and receipts, a wastebasket, and even a shredder.

When I returned to this client's house I was thrilled to see that he had a low cabinet in place now, providing room for a charging station, a bowl for change, and a small sleek shredder! The Bonsaii Desktop Shredder is small enough to fit in the space, and its modern styling is a perfect fit for this client's decor.

This illustrates an important organizing concept: keep the tools you need (shredder, wastebasket) as close to where you use them, even if this means you have duplicates. The client had a shredder in a downstairs office, but the process of gathering receipts and taking them downstairs to shred was cumbersome and just didn't happen. The client was determined to keep his bedroom surfaces clear, and this receipt shredder is a perfect solution.

Hidden Storage with a File Ottoman

Today so many of us do our paperwork or bill paying from the kitchen table or the couch. I'm a big advocate for keeping the files we need near where we actually use them, and I've written before about my own hidden financial file storage.

There are some great options for "hidden" file storage in a file storage ottoman. You can find file ottomans online at Grandinroad or amazon, and in stores like Target and Costco. 

A friend happily showed me the ottoman she found below, which not only has room for lots of files but also a tray for office supplies. When closed it looks great an adds seating in her home office. 

So when you can't find your papers, think beyond the stuffed file cabinet and try a storage ottoman. 

Keep Your Spices Organized

Like to cook? Then I’m sure you have a lot of spices. There’s a misconception that organized people must alphabetize their spices. While that’s one way to find what you need, another way is to use the organizing strategy: make it visible and easy to store. There are many ways to effortlessly store your spices. Some kitchens have special pull-out drawers or drawer inserts. In my kitchen, I use a tiered stand in my cabinet.

Other key tips: I also put spices I use more often in the front, and less used in the back.

I also only keep what I really need and use. When you can’t find what you want, clean out your spice area.

Here’s another great idea to make spices visible from one of my clients. She keeps her spices in a pantry/closet in her kitchen. The pantry is pretty deep, but she grouped her spices into a clear container. By keeping the top off, the container can easily slide out like a drawer. She can also pull out the whole bin when she’s cooking.

Since the client looks down at the drawer of spice, she printed round labels for the top of each spice container.

Don’t want to create you own labels? The Container Store has pre-printed ones ready to go!

Need more inspiration? Read this post on my Blog.

The Secret to Clearing Kitchen Cabinet Clutter

Large kitchen cabinets are easy magnets for clutter. Items get lost in the back and it’s hard to see what you’ve got stored in there.

In my client’s kitchen, the base cabinet had to function as the pantry; there was no other space to store food items. It was a typical cabinet configuration with one shelf in the middle. Cereal boxes, canned goods and boxed items were jumbled and hard to retrieve.

Often I try to use items clients already have in their house for storage, but sometimes there is the perfect product to solve a problem. In this case, the solution was a stand-alone elfa drawer unit from The Container Store.

KitchenCabinet2_thumb.jpg

Designed specifically to fit in the cabinet, two of these drawer units filled the space, providing new storage and ease of access. We labeled the handles to know what category  of food (baking, snacks, dinner) to store in each drawer. There was even space on one side for the tall cereal boxes. Perfect!

The other option for this kind of cabinet is to install pull-out drawers. However, my client rents his home and couldn’t install any permanent solution in the cabinet. And when my client moves, he knows he can find another spot to use these stand-alone drawers.

Not convinced about drawers? Read here for more on why I love drawers in kitchens.

A Simple Solution: Pull-Out Drawer

A simple pull-out drawer: that's all it took for my mom to be able to use her kitchen again.

Last winter my mom, who is in her 70s, hurt her back, and getting pots and bowls out of her kitchen cabinets became nearly impossible.  As she recovered, I helped re-organize her kitchen to make it easier to use. At one point she said "I wish there was a way to get to the way back of the shelf without having to get down on my hands and knees."  I had no idea what she had to go through to find items in the back and lift out heavy pots.

Right away I knew that adding simple pull-out drawers was the answer.

I measured her cabinets and in one trip to the Container Store for these metal shelves , I had everything we needed. My husband and I easily installed the drawers in her cabinets, and they were ready to use. The drawers glide out effortlessly, so my mom can access what is in the back, without having to get down on the floor. Each drawer has a locking mechanism so when it is pushed back in, it stays in place.

Pull-out drawers are made to solve the problem my mom faced in her kitchen.

If you want to make your kitchen more functional (as I've written about before), consider adding pull-out drawers. Drawer options include the metal ones I used and bamboo drawers from The Container Store, or custom designed drawers from the company Shelf Genie.

This article first appeared in the September/October 2014 edition of The Neat Sheet. Sign up to receive the Neat Sheet newsletter here!

2 Favorite Travel Tools

A friend recently gave me the gift of two of my favorite travel tools: a zippered bag and a list.

She found this blue zippered pouch by Walker, and knew I would love it. It’s great because it has color, so it stands out in my black purse or black suitcase. It’s mesh so you can see what’s inside, and it is sturdy. I used it on a trip to Florida to hold running gear: my headphones, headband, and my armband cell phone holder.

She also gave me a fun book of packing lists. This thorough list covers everything you might need on a trip, from chewing gum to your tuxedo. It includes helpful reminders for key electronic items such as cell phone, headphones, and chargers.

What’s your favorite tool for an organized trip?

Product Review: Command Picture Strips – Display what you love!

I’m a big proponent of displaying kids artwork and family photos. A few months ago my hallway was painted and now my husband and I had to hang back up all our family photos.

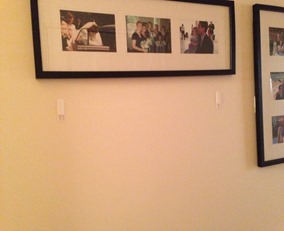
Hanging anything in our old home is a challenge because nothing is straight or level, but we tried a new product that helped: Command™ Picture Strips. Like Command™ Hooks, you measure and adhere the strips to the wall first, and then put the other side of the strip on the frame.

IMG_2137_thumb.jpg
IMG_2135_thumb.jpg

The Picture Strips worked so well, and the best part is that they won’t ruin our beautifully-painted walls if we decide to take the frames down.

IMG_2138_thumb.jpg

How Do I Get Rid of: Shredding

This month I’ve been helping many clients get their financial files set up for the year, and get organized for tax time. Part of the process is getting rid of important or sensitive documents that you no longer need. The best way to do this is to shred the papers.

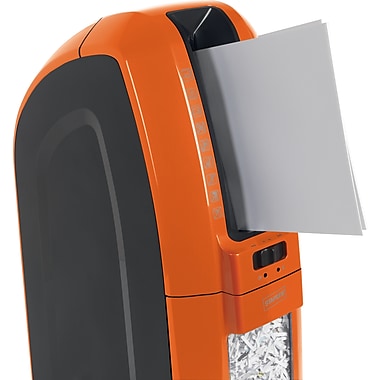
It seems easy to get rid of shredding, but so many times I see piles of papers left “to be shredded” on top of shredders. As it turns out, the shredders often don’t work, and the papers pile up.Staples Space-Saver 10-Sheet Cross-Cut Shredder

Got shredding? Here are some ways to get rid of it:

1. Get a new shredder that works. To keep up with once-in-a-while shredding needs, basic shredders work fine. This model is available in several fun colors and fits right on a small shelf with easy access.

2. If you have boxes and boxes of old documents to shred, outsource the shredding.

  • A great local resource is Doc Shredding Corp. They will come to pick up your boxes of shredding, and also destroy computer hard drives.
  • Check to see if your town offers any shredding days. My town holds a spring and fall Community Recycle Day and always offers free shredding services.
  • Bring your boxes of shredding to Office Depot or Staples for in-store shredding.

Don’t let piles of shredding build up in your home or office. Get a new shredder and get rid of the paper, or have someone else do the shredding for you.

Secret Storage & Fun Hooks

Inspired by my friend Casey’s blog post about cool decor on sale at Target (check out her interiors and inspiration at Loft & Cottage), I went to Target recently and found two new fun items to help keep your home organized.

  • Fun Hooks: Most kids won’t spend time hanging up their coat in a closet, and hooks are the way to go. These new character hooks could be a fun way to encourage your child to hang up their coat or backpack (check the hook weight limits). The characters make the hook more special than regular ones, and can help to distinguish where your child’s things need to go.


What deals have you found at Target lately?

Organizing LEGOs®

In 2008, in one of the first editions of The Neat Sheet, my email newsletter, I gave several ideas for organizing your LEGOs® in honor of the 50th anniversary of the amazing toy.

Parents ask me how to tame the LEGOs® all the time, so I'm sharing some new ideas. 

  • Drawers: The LEGO® Workstation offers a standing frame with a set of  6 cases that come out and can be carried around. The cases snap tightly to hold LEGOs®, and could be organized by project. This solution would help keep the little pieces or projects all in one area, and can be found at The Container Store, amazon.com and other places online. Other shelving units like this could also be used for LEGO® storage.
  • Under the bed: Here's a creative DIY storage solution. This dad built  a rolling drawer, but the same thing could be created with a sturdy underbed container with shoeboxes inside as compartments. I love that a child can pull out the drawer and see all the LEGOs® in one spot. This makes it easy for the child to find what they want and put it away!  
  • Shelves: If your child likes to display LEGO® creations and you have some wall space, consider shelves. Here is a great playroom with display shelves and storage bins underneath.

And of course, there are tons of organization ideas on Pinterest. A word of caution: I think many of the solutions are too complicated for the typical child (and parent). 

The bottom line for LEGO® storage:

  • Keep it simple
  • Make it easy to access the LEGOs® and put them away
  • Watch how your kids play with LEGOs®, and get their input how to store/organize them - you might be surprised!

This article originally appeared in the March/April 2014 edition of The Neat Sheet.

New Year, New Closet – Part 2

Last week my elfa closet system was installed and I couldn’t be happier!

After my husband worked so hard on getting the ancient plaster walls repaired in the closet, we decided to have an elfa installer put in the system. My installer was amazing: he was used to working in old homes and was able to use every inch of space.

It’s amazing what a difference it makes when your clothing hangs from the rod facing you, instead of an angle as it used to be (see “before” photo below). I can see everything, and I also noticed how many pairs of pants I have that I haven’t been wearing!

BEFORE    READY AND WAITING

ELFA INSTALLED  A NEW CLOSET

While my closet may look full, I have so much room in between clothes hanging on the rods; items aren’t stuffed in as they were before. I nearly doubled my hanging space. And I love the new pull out shoe shelves. All the components are adjustable, which is a huge plus in a closet.

Do you have a closet system that works for you? What’s your secret to an organized closet?

I have not received any compensation for this post; I am just very happy with how my elfa closet system turned out.

New Year, New Closet – Part I

This year I’m getting a new clothing closet, and I couldn’t be more excited!

I’m fortunate that my 1890s home actually has two closets in the master bedroom, so I have one all to myself. It’s a decent sized closet, but the space was definitely not utilized to its fullest. And like so many closets around here it had one single shelf across the top, and two rods perpendicular to each side – not even straight across!

My fabulous husband is repairing the cracked plaster walls of the closet (see him on Ask This Old House) and then we are going to install an elfa closet system from The Container Store.

The Container Store offers all kinds of adjustable elfa components for “reach-in” closets and I’m in the process of designing one with my local store. Many of my clients rave about elfa so I am looking forward to having a system that utilizes all the space in my closet.

Here are photos of everything that I took out of the closet, and what the empty closet looks like “before.”  Stay tuned for after photos.

Organizing Holiday Lights

Do your holiday lights look like the tangled mess from the movie Christmas Vacation?

I’m always looking for new ideas to store lights and other holiday decorations – anything that helps make it even easier for the next year.

Here’s my run down of some ways to keep your lights organized for the next holiday season:

  • For a simple DIY solution, wrap strings of lights around empty round oatmeal containers.  My husband has been doing this with our Christmas tree lights and it works well. The light-wrapped containers go into a bin, cushioned by tissue paper.
  • Here’s the same idea in a light storage bin you can purchase from Amazon.com.
  • Another easy home-made option is to wrap lights around flat pieces of cardboard (See an example from Martha Stewart).
  • I just saw this storage bin from The Container Store and am intrigued with how it works. I like that the bin comes with removable cord wraps.
  • Or make your own similar container by inserting tension rods into a plastic bin (See example on Better Homes & Gardens).
  • I also like the idea of this product with large reels and a round container to stack the reels.  I find that similar reels work great for extension cords, so this may be a good solution for bigger outdoor lights.

From pre-made products to DIY ideas, there are many options to keep your lights tidy.

What are your tips for organizing holiday lights?

Favorite Container #12: The Keyring App

For the last installment of my year-long Favorite Container series I am highlighting an app that helped me to organize and “contain” my store loyalty cards: Keyring.

In 2010 I wrote about a great card holder for store cards. I got many compliments and queries about the card holder, and for three years it was the perfect old-school solution for me.

But since I’ve got this iPhone, I thought I should explore new ways it can make my life easier. The Keyring app does just that. It’s easy to scan and load your card information on to the app, which then stores the barcode or information. When you are at the store the clerk simply scans the barcode from your phone…and you don’t have to hassle with finding the right store card or sharing your phone number. It also works for storing my library card! The app is available for the iPhone, Android and Windows 7 phones.

What apps have made your life easier this year?

Got Keys?

Always loosing your keys?  I often work with clients to set up a landing pad – a place where they ALWAYS put their keys, phone, and other important items.

But keys can get misplaced. If losing your keys drives you crazy, here are some creative ways to remember your keys:

Or get rid of the house keys all together: One of my clients installed a keypad number lock on all her doors, instead of a traditional key lock, because she always was losing her keys!  The other members of her family had the same issue and they happily agreed to get a keypad lock. I think this is a clever solution to an annoying problem.

Favorite Container #10: Medicine Cabinet Organizer

The medicine cabinet: a space you probably don’t think about often, but it’s one that you use several times a day.  Here’s a great product to help keep it tidy!

A few years ago when I was trying to de-clutter my medicine cabinet I found this amazing shelf organizer. We had lots of small items in our cabinet and it was a challenge to keep them all together.

Usually I like to re-purpose items but the shelf organizer was made to fit on the narrow shelves of a medicine cabinet. It worked so perfectly to corral all my small items.

Such a simple product, but it works and make finding things so much easier.

You can find many styles of medicine cabinet shelf organizers at the The Container Store or amazon.com.

Favorite Container #7: Eagle Creek™ Pack-It™ Cubes

This month kicks off my summer travel and I’m very excited to report on my new favorite container for travel: the Eagle Creek™ Pack-It™ Specter Cubes.

When my husband and I travel together we often share a suitcase. Everything inside starts out nice and neatly folded, but after day 1, his stacks of clothes start to topple over into my clothes. After a few days it’s chaos and neither of us can easily find what we need.

The Eagle Creek™ Pack-It™ Specter Cubes solved this problem! My husband and I tested out the cubes on our eight-day trip to South Dakota, where we would be packing and re-packing often.

We bought two sets of small, medium and large. While the small size was pretty small to hold much, the large size worked great to hold stacks of shirts or shorts.

The cubes are super light and fit perfectly into a carry-on or full size suitcase. Best of all, they kept my clothes separate from my husband’s. My husband also loved that the cubes make it very easy to re-pack items after several days away.

This specific product helped us solve a nagging issue. Sometimes a specialized container is the way to go.

That’s Neat! Organizing did not receive any compensation for this review. I just love the product!