Organizational Keys to Kindergarten: Getting Ready for School Days

This week I was helping a client get organized before her daughter starts Kindergarten this fall. This can be such a big transition for a family, and may even be harder for the parents than the child! A child starting school for the first time can mean a whole new set of organizational demands for a family. Now there are backpacks, papers that have to go back to school, and even bus schedules to contend with.

Here are 3 key organization challenges to plan for, before back-to-school:

  • Where will the backpack go? Is there a hook or cubby where your child can put her backpack each day? My daughter started putting her backpack in a basket in elementary school and this still works for her in high school. Having a designated spot helps you - and your child - know where to go each morning for the backpack.

  • Where will the jacket/coat/shoes go? You may have this set already, but if not, consider hooks that your child can reach. As your child starts school, you want to build their independence not only at school, but at home.

  • Where will the papers that come home from school go? This can be a huge challenge for families. You’ll need to find a spot for the school work/artwork to go (recycle some!), and a place for papers that you need to send back to school. And don’t forget about papers that come home that you may need to reference again. A desktop file can be a great way to keep these papers sorted.

If your family is feeling overwhelmed with back-to-school set up or routines, I’m here to help! Contact me today.

DeskTopFile.jpg

Backpack Storage

Problem: Your child's backpack ends up all over the house...in the kitchen, in the living room, near the shoes, but never in the same spot. 

Solution: Give the backpack a "home," a set storage place where it goes every day once it is unpacked. Yes, every day. This is a routine even young elementary school students can master. Even if you don't have a dedicated mudroom, you can find a place for the backpack. 

Backpack storage ideas:

BackpackBasket.JPG
  • Give it a "drop spot" by using a basket placed on the floor. My 8th grader has been using this basket for her backpack since Kindergarten. Even when we were in the midst of a long home renovation project and the basket was relocated to a new spot, it was a visual cue for where to put her backpack.
  • Use a hook, at the correct height for your child to reach. 
  • Stash it in a cubby. Many homes have built-in cubbies, but make sure your child can reach it.

Organizing for School Lunches

School starts next week in our town and I’ve already been hearing many mom friends lament that it will soon be time for the arduous task of making school lunches. For many this seems to be quite a chore, so here are 5 ways to streamline school lunch-making:


  • Have your fridge and pantry set up for easy lunch making. Here’s one idea for using clear bins in your fridge. I have a “snack” bin in our pantry; my daughter knows that she can select 1-2 items from the bin for her lunch.  Also have your containers and wraps easily accessible in your kitchen. Here’s my organized food container drawer, which makes it easy to find what we need.
  • Devise an easy “recipe” for school lunches. As I mentioned, we came up with a formula of 2 fruits, 1 veggie, 1-2 snack items + sandwich and a drink. Find a formula that works for your family. You may end up packing nearly the same thing every day and if your child likes it, great!
  • Empty lunchboxes when kids get home from school each afternoon. There is nothing worse than opening a lunchbox or container and finding the smelly remnants of a previous meal. If lunch boxes get emptied and cleaned every day (have your kids do this!) they will be ready for filling that evening or the next day.
  • Have your kids buy lunch at school. This plan saves many families, even if the kids buy lunch only 1-2 days a week. At my house I print out the monthly lunch calendar and my daughter looks ahead and circles the days she wants to buy lunch.
  • Finally, don’t forget to get input from your kids on what they want for lunch. Sometimes my daughter has asked for surprising lunch items based on what she’s seen friends eat at school.

What are your clever solutions for school lunches?

Kids Clothing Organizer

It’s back to school time! While I’m excited for the return to a more regular routine, it also means back to overseeing homework, packing lunches, and making sure the favorite shirt is clean.

One way to avoid arguments in the morning about what your child is wearing to school is to use an outfit sorter. It hangs from the rod in the closet and provides a slot for each day of the week. Your child chooses their outfits for the week ahead of time, maybe on Sunday (or the night before) and puts everything into the slot. Then in the morning it is so easy to grab the clothes and get dressed!

Not only does this pre-planning help alleviate some of the morning stress, it also teaches your child to be more independent.  It also helps you both find out if the favorite shirt is in the wash, avoiding last minute frustration.

Here are a few examples of clothing organizers:

For more on organizing your child’s room, check out my video from This Mom Needs Help!

Favorite Container #8: Desktop File

This month, August, I’m back to thinking about papers as the start of school approaches. I’ve been filling out school-related forms, signing my daughter up for after-school activities, and receiving lots of information from her new teams and groups.

My all-time favorite container for organizing papers and projects is a desktop file box. Here are the details:

What:  A box that is designed to hold hanging folders and files, and can sit on your desk or kitchen counter.

When to use it: Use this kind of box for your key files – files that you need to see all the time, and for current projects. My desktop file box always has these folders in it:

  • Camp Ideas (for my daughter)
  • Activities (for my daughter – things she may want to try)
  • To Buy
  • Family Meeting (any papers that my husband and I need to discuss)
  • Current Projects – Home (colors for a bedroom, estimates from the painter) Current Projects – Work

How to use it: Create hanging file folders for the key papers you tend to hold on to – not for every one, but what are the general categories of papers that end up on your counter or desk? Once you have the categories set, you can use individual manila file folders to separate papers inside the hanging folder if needed. Note: The categories may change over time as you see what kinds of papers you have, so don’t be afraid to change the folders.  No system is perfect at the beginning – you need to live with it and use it for a while to see what works.

Why to use it: A desktop file box helps move your papers from piles to vertical files, making them much easier to see! When you can see your papers, you can actually take them out and use them…and have a place to put them away.

Where to purchase: Basic desktop file boxes can be found at Staples and Office Max. Look on Amazon.com and The Container Store for file boxes in fun designs and natural materials.

See how a client set up her own Desktop File box in this blog post. For an idea on how to organize your financial papers, check out this recent Favorite Container post.

Organizing from a Child’s Perspective

This week I helped a mom of two – with twins on the way – get through a few organizing projects. One of the goals was to organize items in a way that her children could access them on their own, because this mom is going to be busy when her new babies arrive!

One of the projects we tackled in the kitchen was to sort and organize the kids plastic plates, bowls, cups and utensils. They had been stashed in a few spots in the kitchen, so we gathered them up, sorted through to keep the best, and then relocated everything to a new home. We were able to claim a whole drawer that was now the designated “kids drawer.” Everything they’d need for meals was in there, and they could easily reach it. This client reported that her kids loved that they had their own space in the kitchen.

The other project was to get a closet filled with games, craft supplies and other items in better order. It was pretty well sorted and organized, but we brainstormed how to make it work even better. With the addition of the clear plastic drawers, the arts and crafts items now each had a storage spot – all labeled.  Many of the supplies had been stored in stacked plastic bins which is OK, but the drawers brought the items down to where the kids could easily see and access what they’d need.

Just a few changes should have a big impact on this family.

A+ Homework Helpers

Try these tips to set up an effective homework spot for your child:

  • Clear the desk clutter. Does your child have a clear space to spread out and work? Remove anything that has piled up on the desk but isn't related to homework.
  • Have the most-used supplies (pens, pencils, stapler, notepad) out on the desk and ready to go.
  • Make sure your child's desk has drawers or another spot to keep the less-used school/craft supplies.
  • If your child prefers to work at the kitchen, stash supplies in a cabinet or basket.
  • Have good lighting for the workspace.
  • If your child likes to work on the bed, get a lap desk.
  • Provide a place for the papers. No matter where your child likes to work - desk, bed, or kitchen counter - be sure they have a place to store their school papers. A desktop file works great - label a folder for each class.

This article originally appeared in The Neat Sheet September/October 2012

Switching Kids Rooms

Moving rooms around in your house is never an easy task…especially when it is the hottest week of summer.

I recently got a call from a busy working mom of four. She had started a big project of swapping her kids rooms. Thanks to a renovation, her oldest daughter was getting her own room for the first time. While most of the furniture was in the proper room, all four kids’ clothes and toys weren’t…and this client needed this project done quickly.

On a sweltering night, my client’s husband took all the kids out to a friend’s house, and we dove in to the project. Before I even arrived the client had started and made a ton of progress. Just knowing I was coming got her inspired to move ahead with the “overwhelming job.”

We moved around the furniture in the daughter’s new room to a more efficient layout, then started to sort and put away her clothes. Of course we found lots of clothes and things that belonged in other kids’ rooms, so along the way we switched some dressers and moved other furniture. Did I mention that we folded and put away a ton of clothes?

With some help from iced coffees, water, and fans we finally got all the “girls stuff” out of the son’s bedroom, and everyone was happy…especially mom. It’s amazing how much can be done in a few hours when you have the right motivation.

See below for the “before” and “after” photos.

Best of Back to School

It’s that time of year again! Whether your kids are off to college or starting out in Kindergarten, we’ve got tips for you.

Here is a collection of our best back to school posts. What could be easier?

What is your favorite back-to-school tip?

A Frenzy of Forms

Parents: get out your No. 2 pencils, it’s the start of the school year! As any parent of a school-age child knows, there seems to be a never-ending supply of required forms. I thought there were a lot to complete for the start of Kindergarten, but the forms continued throughout the school year and summer. There were forms for the after-school program, health forms for sports, forms for each summer camp, and now forms for the new classroom teacher.

Talking about this frenzy of forms with another mom/organizer friend, she shared her secret: she keeps a copy of the form before turning it in. What a brilliant idea! Often the information required is the same each year (emergency contacts, doctor’s phone number, insurance information, for example). Why not have a copy to make it easier to fill out next time?

I’m going to take this one step further: scan the form. Then I’ll have the information for easy reference for the next time, but not the paper.

Dorm Space Savers 101

Recently I had one of my most fun organizing sessions ever: helping my niece set up her dorm room at Harvard! She may have been the only freshman with her own personal organizer, but her mom (my sister) had everything well prepared…including coming with a ton of organizing products.

Although my daughter won’t be heading off to college for quite a while, I was taking notes on what products really worked. Here are my three favorites: 

  1. Slimline hangers by Real Simple – I love slimline hangers, and these have a great improvement: small hooks which allow the hangers to hang from each other, saving space. Using these hangers meant my niece could get twice as many clothes into her closet.
  2. Clear drawers – These drawers were perfect for organizing shoes, boots, and linens under the bed. We were able to stack two on top of each other gaining even more space.
  3. 3M Command products – The Command products are perfect for hanging up, not marking up, dorm rooms. We used them to hang everything from magnet boards, to pictures, to scarf holders in the closet.

My niece was excited to have her dorm room set up, decorated, and get all her clothes in the closet.

All (School) Systems Go!

Four…three…two…one! Has school already begun?

The countdown is on for back-to-school, and now is the time to set up (or create!) your systems to stay organized. In my home, during the summer we have different routines and have been on vacation…so we don’t always follow our typical ways of doing things. This is part of summer and the change is good!

Just don’t forget to get ready and set for school.

Be sure that you have a way to deal with:

  • the coming deluge of school papers, including homework, permissions slips and artwork you want to keep
  • packing bags and backpacks
  • making lunches
  • scheduling activities
  • finding the right equipment for those activities (soccer ball, ice skates, tap shoes)
  • finding what you need to get out the door!

A “system” doesn’t have to be complex – it is just a process or routine for regular activities to help us stay organized. And simple is often better.

For example, use a basket on the kitchen counter to catch incoming school papers that need your attention. Update your family resource binder with the new class information. Make lunches and have kids pick out clothes the night before. Use a family calendar – paper or electronic – to schedule activities and school days off.

These are just a few ideas. For more, search our blog under the categories “kids” or “school” or contact That’s Neat! Organizing and we’ll set up a customized system just for you.

Back to School

It’s August, and in New England that means it’s time again to shop for school supplies, new clothes, a lunchbox, or dorm room gear. In other parts of the country classes may have already started.

In honor of back-to-school month we are highlighting our favorite posts from the past year about getting organized for school. Enjoy!

Off to College

Organizing for the College Years

Elementary, My Dear Organizer

School's Out Organizing Part I: Paper Purge

School's Out Organizing Part II: Backpack Black Hole

School’s Out Organizing Part II: The Backpack Black Hole

In a recent post I recommended that parents undertake an end-of-year paper purge of school information. Continuing with that theme…don’t forget the black hole of your student’s backpack!

For many students, the backpack is a black hole: things go in and they don’t come out.

Even if your child is usually good at routinely going through the contents of the backpack, the end of year busyness may mean that papers, projects and other things get shoved in, and there isn’t as much time to go through them.  (My kindergartener is fairly organized but I know all spring she has been stashing more and more toys in her backpack for “free choice time.” I don’t think she has any idea how many erasers and Polly Pockets she has accumulated.)

Now’s the time to take a look in the backpack and clean out the papers, trash, food remnants, toys, and whatever else has been hiding in there. Parents of younger kids may need to lend a helping hand, but for older elementary school kids they should be able to do this on their own. At minimum, a child can dump everything out and the parent can guide the sorting of items into basic categories: trash, recycle, and things to keep.

Don’t forget to check out the lunch box too! If it can be used next year, give it a good cleaning. If not, be sure to make a note to buy a new one in the summer.

School’s Out Organizing Part I: The Paper Purge

It’s that time of year: school is almost out for summer!! This year, as school winds down, plan 30 minutes  to organize or "reset" the papers from the end of school craziness. 

In just 30 minutes you can get a lot done. Here’s how to get started:

  • Purge last year's school papers from your notebook, folder, or the pile on the kitchen counter where they have been sitting all year. Much of this paperwork will not be necessary to keep.

  • If there are papers such as class lists you want to keep, you can 1) file in a manila folder labeled with your child’s name, school and year…or better yet, 2) scan the document and toss the paper!

  • Start a file or binder for the incoming papers you'll receive for the new school year. Label this folder/binder with the school name and year.

  • Sort and purge the pile of school projects or artwork. Save the special pieces in a file or box (be sure to date them), and archive them in a dry, out of the way spot such as your attic or a closet.

  • Pick 1-2 creations to display and enjoy. (For more ideas on displaying and using artwork, see this article on my website.)

You can even turn this task into an end-of-school year ceremony with your child. Go through the projects and artwork with your child and have him/her help select the pieces to keep. Celebrate the year's achievements and then enjoy some special time together getting some ice cream, taking a walk, or playing your child's favorite game.

Take some time now to reset the school papers for summer...and in September you'll be glad you did!

Note: This article is based on one originally published in the July/August 2009 edition of The Neat Sheet.

Fine Art – Part II

In this second installment by guest blogger, Janna, she reveals the system she set up for her daughter's artwork and school papers.

When Kate was little, she created a “masterpiece” (or more) a day. I loved them, hung a number of them on my ‘fridge or in my office and saved them all. Once in awhile I’d pull out a really special one, frame it simply and hang it on the ‘art wall’ that was located in our center hall.

That art wall made us smile everyday and Kate was so proud to have her work on display. Her friends would come to play and comment, “you have your own art wall”! It was there until we knocked it down as part of the remodel.  A happy and sad day all at the same time.

I knew all of those pieces were created with every bit of Kate’s heart and soul. This was probably the only organizing project where I saved more than I tossed. However, I did come to realize some pieces were awesome stand-outs and some were not.

In yesterday’s post, the story I told helped me to organize this often overwhelming task.

Here is the system I created for sorting, saving, tossing and archiving all of those special projects. One day, I’ll pass it all on to Kate. My hope is that the system I created will help her to decide what to do with it all.

1. Date everything! Each time your little one hands you a ‘special piece’, write the date on it. If you start now, it will make filing so much easier later on.

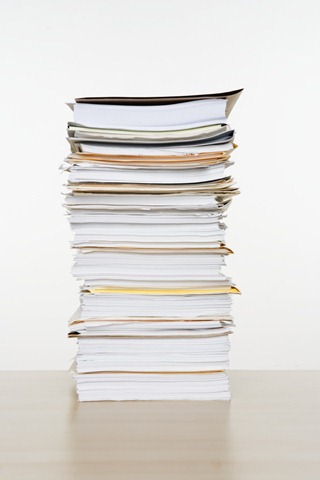
2. Sort. This is the hardest part. But, as I mentioned above, some things are stand-outs and some are not. Every piece of paper with a crayon stick drawing or a paint swash, while special at the time of it’s creation – may not really tell the story later on. I found I had saved a lot more swashes and crayon marks than I had masterpieces! Soon, sorting and archiving became less daunting.

3. Once your special pieces are sorted, make piles for each year. Some things will be much larger than others.

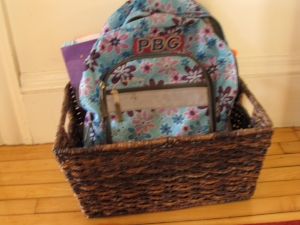
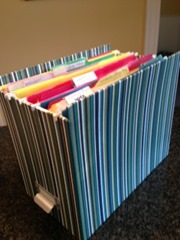
4. Purchase a variety of envelopes, flat portfolios (or make some with large cardboard, bookbinding tape and a few pieces of ribbon for each), and labels. Local office supply stores have good selections.

5. Label each portfolio with the year. You will quickly notice, that as the kids get older, the artwork, papers, etc. become less frequent! You’ll find that you can combine years. Just remember to label each portfolio appropriately.

6. Group smaller pieces into suitable sized envelopes. Date and label their contents and slip into the correct portfolios.

7. For pieces that are not flat, (the hand print in the plaster for instance,) either make a pocket on the front of your portfolio or create a box for these special items. Date each item, label the box and keep it with the rest of the archives.

8. Keep all of the portfolios in a convenient to get to space. If possible, keep your archives in your home where the temperature is a little easier controlled.

That’s it! It really is that simple.

A few things to note:

  • Once the kids have grown and you feel it’s time to pass down the archives, select a few of your particular favorite pieces and hang onto them. Display them once in awhile and revel in the memories.

Finally, visit your archives often. At different times during the year, I’ll pull out a special little ‘gem’ and put it in my kitchen window or on my desk. For Halloween I always seem to select the same one. This year in particular, it’s a dear reminder of my college freshman, a special memento that always tugs at my heart.

-Janna

Fine Art – Part I

In this guest post my cousin Janna shares her ides for organizing her a child's artwork and school papers.

About five years ago, on a cold winter day, I decided to sort and organize my daughter’s school artwork, journals and special homework assignments. It was one of a number of projects I needed to tackle to prepare for our upcoming home remodel.

As you can imagine, it was a delightful trip down memory lane, but a sad one too.

Imagine my guilt as I forced myself to cull through all of the “special” pieces, making piles to save and a pile to toss.

I kept thinking about a large envelope I received when I graduated from high school. It was from Elizabeth’s mom, my aunt Janet.

It contained artwork, letters and other special mementos I had sent to her during my childhood. I remember receiving that envelope and how fun and funny it was to look through it.

I still have it. And every once in awhile, I run across it in my family archives desk. I pull out its contents and have a good laugh.

Over the years, I too have saved a few special things from nephews, nieces and small cousins. I plan to do the same for them, a lovely family tradition – don’t you think?

It will be up to them to decide what to do with it.

And that’s the point. No matter how hard we try to clean up, sort and organize, there are some things that are just too difficult to decide upon.

Janet’s solution was perfect. She did her best, culled out her favorites and sent them back!

I am forever grateful for her thoughtfulness and her forward thinking.

   Coming Next: Part 2 – My system for organizing the artwork

-Janna

School Papers—Contained!

I’ve written recently about purging and preparing for the onslaught of Kindergarten papers. A month into the school year and there is a lot of paper coming home. After trying a few different systems, I seem to have found one that works for me.

When setting up a paper management system, I try to work with my clients’ natural tendencies for where they put things (as long as it isn’t the floor!). In my case, the pre-school papers and artwork seemed to congregate on one counter in the kitchen…probably because this is where we’d unpack the school bag to clean out the lunch containers. Following my own advice, I designated this corner as the official School Paper Zone.

I felt better knowing that the pile of papers in the corner now had a reason for being there. But I was still bothered by the pile. So I went one step farther: instead of just having the papers and artwork piling up and annoying me, I decided to try and contain them (again, following the same advice I give my clients) in an inexpensive basket.

In the back of the basket is my Family Information Binder, which includes a section for critical school information like the class list and calendar. Next comes a few pieces of papers that I’m referencing all the time, such as the school lunch calendar and a helpful tip sheet from the teacher. These papers stand up in front of the binder so I can grab them easily. In the front of the basket I’m stashing the art and projects that come home from school. This is a small space so I’m hoping it will force me to go through the masterpieces every week. (More to come on the artwork organization project.)

I’ve found that the basket serves several purposes: 1) it contains and limits the papers—if they don’t fit, I know I need to purge; 2) it looks nice and now this corner doesn’t bother me; and 3) it is easy to move if I want it temporarily out of sight because we are having a party or some other event.

This was a very inexpensive and simple system, even though it took me a few tries to get it right. Don’t forget that simple is often better, and don’t give up if you can’t find something that works right away.

Out with the Old, In with the New: Organizing for the College Years

More ideas from my cousin Janna on how to stay organized while your child is in college. 

This project was quite possibly the easiest organizing project I’ve ever done. In the span of about 10 minutes I had it finished.

Late in June, we attended college orientation at the University of Montana. After attending the three-day event, we knew this was going to be the perfect place for our daughter. It was obvious the university had perfected their sales pitch and by the last day we were happy to send them both our daughter and our hard-earned dollars.

We were all impressed by many of the presentations and fun activities, but what sealed the deal for me was how organized they were!

Now it’s September, she is finishing her first week as a college student, and I spent a few minutes setting up some new files. As far as I can tell, my new system (based on my old one) will take me right through to graduation.

It was simple, here are a few things that make it work:

  • Clean out the high school papers, calendars, and other documents. File and store the important stuff like report cards, certificates and photos with your family archives.
  • Set up a new system using information from the college. For example I set up files that include topics such as: calendars; banking; books; business services (how to pay our bill!); contact information (phone numbers and email addresses); health care; housing; meal plan; and scholarship information.
  • Keep the files handy. I keep them in the top drawer of our file cabinet where I file our monthly paid bills, etc.

Unlike Elizabeth’s system, mine is based on old technology and a system I developed when our daughter started Kindergarten. But, it works the same, it’s handy and it’s easy for me. Isn’t that what it’s all about anyway?

-Janna